About Me

My photo
Former teacher, clinical social worker and now entrepreneur. My focus, no matter what career I am engaged in, has been on helping people. Now I am on an incredible journey to change life in a leaner, cleaner, greener way. I hope you will join me in this transition.
Showing posts with label recipe. Show all posts

Friday, March 22, 2013

Homemade Antiseptic Mouthwash

All images from the Frugally Sustainable Blog

Here is another great article from the Frugally Sustainable Blog.

By now you all should know that I love to make my own natural health, home, and beauty products. I love them because they work and I love them because they’re frugal. So when I was using my fancy-pants “eco friendly, 100% natural” mouthwash the other day, I thought to myself, “I think I could make this and save myself some money!”

Benefits of Using Homemade Mouthwash
Good oral care is vital to our health and vice versa. Health and diet have even been know to  heal cavities! Rinsing out the mouth with a cleansing mouthwash is a large part of good oral hygiene. And there are many benefits to making your own:

  • It’s cheap. You can create your own mouthwash at a fraction of the cost of store-bought and still experience excellent results.


  • You control the ingredients. Making your own mouthwash allows you to control the quality of that which you put into your mouth


  • No hidden chemicals. Commercially-prepared products are often heavy-laden with additives such as preservatives, dyes, artifical sweeteners and a multitude of harmful chemicals. Eliminate them all by making your own!


  • Variety of Homemade Mouthwash Recipes
    There are a variety of different recipes to meet the needs of every individual. Here are just a few:

    Basic Mouthwash: 1 cup water, 1 teaspoon baking soda, and 3 drops peppermint essential oils. Mix all ingredients in a glass jar and shake well. Swish in mouth, then spit out. Store on bathroom counter.

    Old-Fashioned Disinfectant Mouthwash: 1 cup water and 2 tablespoons apple cider vinegar. Combine ingredients and store in a glass jar. Shake well prior to use. Swish mixture in mouth, then spit out. Will keep indefinitely on the counter.

    Hydrogen Peroxide Mouthwash: 1 part hydrogen peroxide mixed with 1 part water. Swish mouthwash in mouth, then spit out. Mix enough for single use and discard extra solution.

    Lemon Whitening Mouthwash: Not really a mouthwash, but you can rub a piece of lemon on stained teeth for a whitening effect.

    Herbal Mouthwash: Create an herbal infusion by steeping 2 cups of boiling water, 1/2 ounce of whole cloves, 1 ounce of Oregon grape root, and 1 ounce of rosemary in a pint-sized glass mason jar, overnight. In the morning strain the infusion using a piece of cheesecloth. Swish in mouth, the spit out. Store in a glass jar in the refrigerator. Will keep for 1 week.

    Simple Essential Oil Mouthwash: To 1 cup of water add 20 drops of either cinnamon, clove, wintergreen, or tea tree oil. Combine all ingredients in a glass jar. Shake well prior to each use in order to distribute the essential oils. Will keep on the bathroom counter indefinitely.

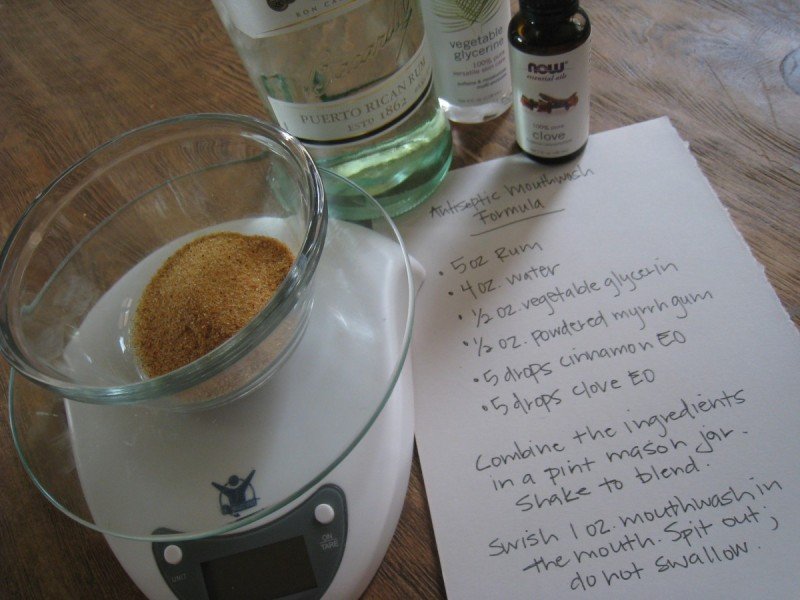
    Antiseptic Homemade Mouthwash


    Gather the ingredients:
    -5 ounces Rum or Vodka
    -4 ounces water
    -1/2 ounce vegetable glycerin
    -1/2 ounce powdered myrrh gum
    -5 drops essential oils of cinnamon
    -5 drops essential oils of clove

    Directions:
    Combine all ingredients in a pint-sized glass mason jar.

    Shake well to blend.
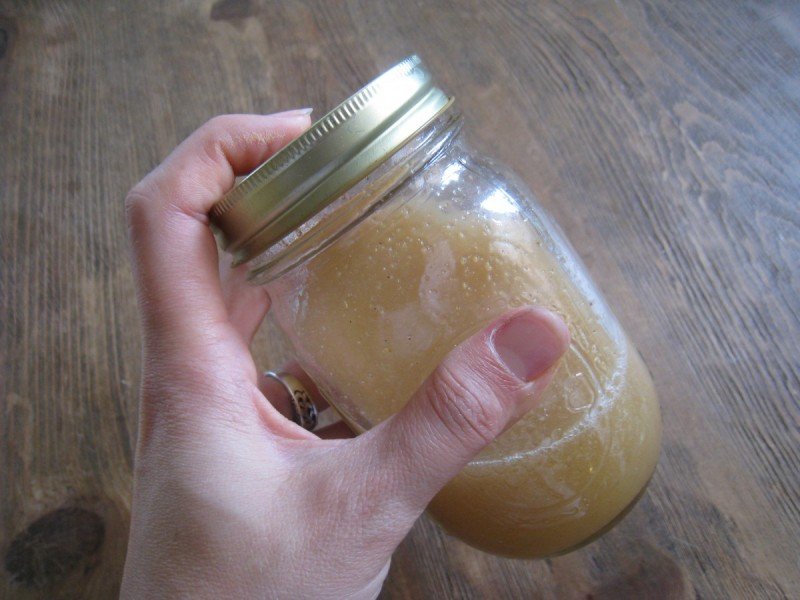


    To use:
    I do not recommend that you use this mouthwash daily — due to the alcohol content of this mixture, it can have a drying effect. Use of this solution may be better limited to times when a more antiseptic oral cleanse is desired. Shake well prior to use. Swish in mouth, then spit out. Will store in glass jar on bathroom counter indefinitely.

    Notes
    Myrrh gum has broad-spectrum antiseptic properties. It is also well known as an anti-inflammatory — excellent for use in treatment of oral ailments…namely gum disease.

    Cinnamon contains many antimicrobial properties as well. It also functions as a natural preservative.

    Essential oils of Clove can be used to heal and prevent cavities. It relieves the pain of a toothache. And it can also act to decrease oral infections because of its antiseptic properties.

    Rum and Vodka kill bacteria and freshen breath.

    Most of the ingredients can be found over-the-counter at a pharmacy. You can purchase powdered myrrh gum and the essential oils from Mountain Rose Herbs or The Bulk Herb Store.

    What does your natural oral care routine look like? Please share it with us.

    Please note: These are my own opinions derived from my own research. The statements made here have not been approved by the Food and Drug Administration or the American Dental Association. They are not intended to diagnose, treat or cure or prevent any disease.


    Thursday, March 21, 2013

    Homemade Mosquito Repellant

    Image from SurvivingTheStore.com
    I am REALLY going to try out this natural recipe!  Because I am sooooooooo sweet (wink), I am a total mosquito magnet.  I hope this works ... it would awesome to be able to sit out at night looking at the stars with my hubby and not feel like a human buffet for the bugs!! You can find this article on the Homesteading/Survivalism FB page.
     
    Combine in a 16 oz bottle:
    15 drops lavender oil [http://amzn.to/WOhOP8]
    3-4 Tbsp of vanilla extract
    10 drops of citronella oil [http://amzn.to/ZOLfyc]
    1/4 Cup lemon juice.

    Fill bottle with water. 
    Shake and it's ready to use.
    Spray on yourself.

    (You can also use 10 drops of lemon eucalyptus oil instead of citronella oil [http://amzn.to/ZfYPbx])

    Make some extra to gift to your neighbors, family & friends. Share this on your wall so you'll have it handy when it's needed.

    Note: If you don't already have the oils mentioned above, the links provided are available for you to order them online.
     
    P.S. I actually learned this little bit of trivia in a Trivia Game.  Mosquitos are attracted to people who eat bananas.  Guess what is off my food list in the summer!!!


    Meals in Jars plus Recipes

    I saw this article on the Frugally Sustainable FB page. Even though she is concerned about food prices and shortages, I think these ideas would be terrific for camping trips and quicky dinners, too!

    Meals in Jars

    When I see news headlines like these…

    U.S. Drought Driving Up Already Rising Food Prices While Economy Collapses! Get Prepared!
    Drought means beef prices could rise
    Multi-Billion Dollar Drought to Drive Beef Prices Up

    …my first reaction is to freak out! It’s natural to experience feelings of fear and/or anxiety when reading news stories like this, right? But why, why would I waste one second of my life worrying about something I have no control over? You know what eases my fear: knowledge, preparedness, and a community of people that I trust.

    About six months ago we began storing food. Buckets and buckets of organic beans, rice, quinoa, millet, oatmeal, popcorn, etc. now fill the once empty spaces of our closets. Given the access to water, we would be able to feed our immediate family and my parents (maybe even help out the neighbors) for about half a year. However, my thoughts lately are turning toward the possibility of using this food in the event prices of commodities were to increase, even more than they already have.

    I’ve also been trying to organize what we do have and make it more practical for use. Today I began working on “meals in jars.” By combining beans, grains, dehydrated veggies/fruit from the garden, and seasonings I am attempting to ensure that we will have a supply of tasty and nutritious meals in the case of an emergency. Not to mention, it’s been a fun activity for the kids and I. It’s like canning beans and grains, but instead of using the pressure cooker all we do is place an oxygen absorber in the jar (smile).

    There are thousands of different recipes you could follow when creating your meals in jars. Just remember to combine items that take approximately the same amount of time to cook. For example, do not intermix pasta with navy beans. The pasta will cook much quicker than the beans.
    For an abundance of recipes to use as a foundation for your meals in jars look on this forum. Below I have also provided you with a few of the recipes we put together today.

    Apple Cinnamon Oatmeal (1 pint jar)
    -1 cup oatmeal
    -1 tsp cinnamon
    -1/4 cup sliced almonds
    -1/4 cup dehydrated apples
    *2 cups water necessary to reconsitute

    Vegetable Millet (1 pint jar)
    -1 cup millet
    -1/4 cup dehydrated mixed veggies
    -1/4 cup dried parsley
    -1 tsp dehydrated minced garlic
    -1 tsp salt
    *3 cups of water necessary to reconsitute

    Quinoa and Lentil Soup (1 quart jar)
    -1 ½ cup quinoa
    -1 ½ cup red lentils
    -1/2 cup dehydrated veggies
    -1/4 cup dehydrated onion
    -1 tsp minced garlic
    -1 tsp salt
    -2 bay leaves
    *5 cups of water necessary to reconsitute

    Lemon Dill Rice (1 pint jar)
    -1 cup rice
    -1/2 tsp dried dill
    -1 ½ tsp dehydrated lemon peel
    -1/2 tsp salt
    *2 cups of water necessary to reconsitute

    For each recipe, layer ingredients in order as listed. Use the size jar as indicated. Place an oxygen absorber on top and then close lid. Store jars in a safe place. Keep off shelves.

    Storage Tips

    -The best way to store beans, grains, and dehydrated veggies/fruit is in a sealed mylar bag along with oxygen absorbers. The individual meals could then be stored in a 5-gallon bucket. Lightweight, takes up less space, it’s just a much better option. So, I’ll continue saving for the supplies required for this system of storage.

    I recommend purchasing mylar bags, oxygen absorbers, and heat sealers from the fine folks over at Preparing Wisely and SorbentSystems.com who sell Made-in-America products.

    The Ant Solution

    Image from Wesley Jueckstock
    This is a recipe for getting rid of those pesky ants that come every spring and summer. Mix up the solution, pack cotton balls in a jar, cover, put the solution into the jar and place in the area of the infestation. 

    Caution: Because boric acid is not pet friendly, the best container would be a small jar or plastic container with a lid in which you have punched some holes.

     Ingredients:
    1 cup sugar
    3 tablespoons boric acid
    3 cups warm water

    Directions:
    1. Mix the sugar and boric acid well.
     

    2. Add the warm water slowly, mixing all the while so it won't be too lumpy.
     

    3. Store in a jar until ready to use.
     

    4. When ready to use, put cotton into the top of a jar lid to fill it and then saturate the cotton to the top.
     

    5. Place it in the location where it is needed.
     

    6. Note: This solution will keep for a long while. A good technique is to drip a drop or two over the edge of the lid to rest on the counter so the ants will find the solution sooner. It sometimes takes a little while for them to find it, but find it they will. When they do, do not disturb them as they drink. They will hang over the edge of the lid and drink for a while and then take it back to the nest killing the colony. Almost overnight they will be gone.

    Tuesday, March 19, 2013

    The Importance of Eating Spinach plus Recipe

    I HATE SPINACH!!! ... or at least I thought I did.  What I hated was cooked spinach ... all stinky and slimey ... ewwwww!!

    My latest discovery is that I DO like spinach ... as long as it is RAW!!  The following poster from the Healthy Food web site tells us how good spinach is for us!  I know, people have always said that, but this is the first time I have really eaten spinach so I am paying attention this time.


    Here is a great summer salad using spinach and strawberries ... who knew they made such a great combination.  This recipe comes from the Mother Nature Network.

     
               Strawberry Spinach Summer Salad

    Ingredients
    • 2 tablespoons balsamic vinegar
    • 2 tablespoons olive oil
    • 1/3 cup sliced almonds, toasted
    • 1 bundle fresh spinach
    • 1 cup strawberries, thinly sliced
    • 4 tablespoons feta cheese, crumbled
     
    Time estimates
    Prep time: 10 minutes
    Total time: 20 minutes

    Directions
    1. Rinse veggies thoroughly.
    2. Combine vinegar and oil in small jar. Close lid and shake well.
    3. Over medium-high heat add dab of oil to saucepan. After one minute add almonds. Stir for five or six minutes or until light brown.
    4. Combine all ingredients in large bowl. Add feta. Toss gently and serve.
    Serves 4

    Sunday, March 17, 2013

    Growing Potatoes plus Recipe

    We are getting ready to plant our potatoes next weekend. I found this great chart on FB for other novice farmers (like us).  I am also including a low fat potato recipe from Eating Well Magazine.

    (P.S. The typo on the chart is theirs not mine -- they must have gone to school with Dan Quayle)


    ROASTED POTATOES AND GREEN BEANS
    Image from Eating Well Magazine


    http:://www.eatingwell.com/recipes/new_potatoes_green_beans.html
    From EatingWell: March/April 2011

    Whoever said potato salad needs to be cold? For this warm version, new potatoes are roasted right alongside green beans, then tossed in a tangy champagne vinegar and Gorgonzola dressing. If you like, you can toss in some baby arugula.
               
    6 servings, about 3/4 cup each | Active Time: 15 minutes | Total Time: 40 minutes

    Ingredients

    • 1 1/2 pounds new or baby potatoes, scrubbed and cut in half
    • 8 ounces green beans, trimmed
    • 5 teaspoons extra-virgin olive oil, divided
    • 1/2 teaspoon salt
    • 1/4 teaspoon freshly ground pepper, plus more to taste
    • 2 tablespoons champagne vinegar or white-wine vinegar
    • 1 tablespoon Dijon mustard
    • 3 tablespoons crumbled Gorgonzola or other blue cheese
    • 2 tablespoons finely chopped scallion greens

    Preparation

    1. Position rack in lower third of oven; preheat to 450°F.
    2. Toss potatoes and green beans in a large bowl with 2 teaspoons oil, salt and pepper. Spread evenly on a rimmed baking sheet. Roast, stirring once or twice, until the potatoes are tender and golden and the green beans are tender and browned in spots, 25 to 35 minutes.
    3. Whisk the remaining 3 teaspoons oil, vinegar and mustard in a large bowl. Stir in cheese and scallion greens.
    4. When the vegetables are done, toss with the dressing in the bowl. Serve warm.

    Nutrition

    Per serving :151 Calories; 5 g Fat; 1 g Sat; 3 g Mono; 3 mg Cholesterol; 23 g Carbohydrates; 4 g Protein; 3 g Fiber; 295 mg Sodium; 567 mg Potassium
    1 1/2 Carbohydrate Serving
    Exchanges: 1 starch, 1 vegetable, 1 fat

    Wednesday, January 30, 2013

    Mock Soy Sauce - Recipe

    
    Image from Taste of Home Magazine
    
    Soy and corn crops are between 85% to 95% genetically modified (GMO).  The dangers of eating this modifed foods are becoming more apparent as scientist are putting the crops under closer scrutiny. 
    As I am cleaning up my diet, I am eating organic or home grown produce (and meat) as much as possible.  I have made many substitutions to my diet to try to eliminate as many environmental pollutants as possible, but one of my staple cooking ingredients, soy sauce, was hard to replace until now.   
    The test kitchens for Taste of Home Magazine  developed this alternative to store-bought soy sauce. Its color and flavor will make you think it’s the real thing. But it's lower in sodium than both regular soy sauce and the low-sodium variety.
    32 Servings Prep/Total Time: 5 min.
    Ingredients
    •             3 tablespoons beef bouillon granules
    •             1-1/2 cups boiling water
    •             1/4 cup plus 1 teaspoon cider vinegar
    •             2 tablespoons sesame oil
    •             1 tablespoon dark molasses
    •             Dash pepper
    Directions
    In a small bowl, dissolve bouillon in boiling water. Stir in the remaining ingredients. Pour into a jar with a tight-fitting lid.
    Store in the refrigerator. Shake well before using. Yield: about 2 cups.
    Nutrition Facts: 1 tablespoon equals 11 calories, 1 g fat (trace saturated fat), trace cholesterol, 222 mg sodium, 1 g carbohydrate, trace fiber, trace protein.

    Sunday, December 11, 2011

    My Holiday Favorites: Holiday Pork Tenderloin with Cranberry/Balsamic Reduction

    This year we are trying something different for our Christmas dinner.  Usually we bring out the ham, pineapple rings and brown sugar/mustard glaze.  This year we are going to fix a scrumptious Pork Tenderloin.  I played around and created this Cranberry/Basalmic Reduction for the top ... and it tasted amazing.  The first time I fixed this dish, I served it with Microwaved Yams and Green Beans ... it was the perfect combination.  Tonight I am actually going to make the cranberry/balsamic reduction and drizzle it over turkey and dressing.

    The other benefit of this meal is that the whole thing can be prepared in LESS than 30 minutes!!! 

    Holday Pork Tenderloin with Cranberry/Balsamic Reduction
    Serves 2
    1-1/2             Tbsp               butter
    1                      8-10oz           pork tenderloin
    1/2                 cup                 chopped onion
    1                      Tbsp               chopped fresh rosemary
    1/2                 cup                 low-salt chicken broth
    1/3                 can                 whole berry cranberry sauce
    1                      Tbsp               balsamic vinegar

    1.  Preheat oven to 450 degrees.  Melt 1/2 Tablespoon butter in heavy large ovenproof skillet over medium-high heat.  Sprinkle pork with salt and pepper.  Sear pork on all sides, about 2 minutes.  Place skillet with pork in oven.  Roast pork until thermometer inserted into center registers 155 degrees, about 10 minutes.
    2.  Meanwhile, melt remaining 1 Tablespoon butter in heavy medium skillet over medium-high heat.  Add onion and rosemary; sauté until onion softens, about 3 minutes.  Add broth, cranberry sauce and vinegar and whisk until cranberry sauce melts, about 2 minutes.
    3.  Transfer pork to work surface.  Scrape any juices from large skillet into cranberry mixture.  Boil until sauce has reduced enough to coat spoon thickly, about 6 minutes.  Season with salt and pepper.  Slice pork and serve with sauce.
    

    Sunday, December 4, 2011

    My Holiday Favorites: Spicey Holiday Pumpkin Dessert

    Spicy Holiday Pumpkin Dessert
    1          15oz can       pumpkin puree (or 100% pumpkin)
    1          12oz can       evaporated milk
    3                                  eggs
    1          cup                 white sugar
    4          tsp                  pumpkin pie spice
    1          18.25 oz       package yellow or spice cake mix (dry)
    3/4     cup                 butter melted
    1-1/2 cups               chopped walnuts
    1.  Preheat oven to 350 degrees.  Grease the 9x13 inch baking pan.
    2.  In a large bowl, combine pumpkin, milk, eggs, sugar and spice.  Mix well, and pour into the greased 9x13 inch pan.
    3.  Sprinkle dry cake mix evenly over the top, then drizzle with melted butter.  Top with chopped walnuts.
    4.  Bake at 350 degrees for 1 hour or until a knife inserted near the center comes out clean.

    Nutrition Info:  Serving size 1/24 of cake
    Calories: 192     Total Fat: 9g     Cholesterol: 42mg     Sodium: 234mg    
    Total Carbs: 26.8g (Dietary Fiber: 0.8g)     Protein: 2g

    Wednesday, September 21, 2011

    Parmesan Sweet Potato Fries - Recipe

    I love sweet potato fries for two reasons.  First, they are sweet and delicious!!! (Always a good thing!!)  And secondly, they have fewer calories since they are baked and not fried.  If I have a regular french fry ala Micky-D's, all I taste is the oil and salt.  Try these great fries, with a touch of Parmesan cheese.
     
    Parmesan Sweet Potato Fries
     
    Ingredients:
    1/2 pound sweet potatoes, cut into 1/4" thick sticks
    1 Tbs. grated reduced-fat Parmesan cheese
    1/2 tsp. extra-virgin olive oil
    1/8 tsp. garlic powder
    1/8 tsp. paprika
    Pinch of cayenne
    Salt to taste

    Directions:
    1. Preheat oven to 450 degrees F
    2. In a medium bowl, toss the potatoes, cheese, olive oil and spices
    3. Place potatoes in a single layer on a medium nonstick baking sheet
    4. Bake for 8 minutes
    5. Flip the potatoes and bake for 10-12 minutes, or until the potatoes are tender and browned
    in spots.
    6. Serve immediately

    Makes 2 Servings

    Nutrition Facts:
    125 Calories, 2.5g Protein, 25g Carbs, 2g Fat, 4mg Cholesterol, 3.5g Fiber,
    119mg Sodium, (3 Points+ Plus)

    Wednesday, September 14, 2011

    Yummy Left-Over Meat Pocket Sandwiches

    This recipe is becoming my "go to" recipe for left-over meat.  I made it last night with my left-over Perfected Pulled Pork (see my recipe on Sept. 12, 2011).  It was fantastic!  Light, flakey, and full of flavor.

    YUMMY LEFT-OVER MEAT POCKET SANDWICHES


    1 can (8 biscuits) Pillsbury Grand Biscuits

    2-2/3 cups left-over shredded & chopped meat (I used pulled pork, but you can also use chicken, beef, etc.)

    Your favorite BBQ seasoning or rub

    1 egg white

    1 tsp water

    Pre-heat oven to 350 degrees.

    1.  Flour surface and rolling pin and roll each biscuit into a 6" round.
    2.  Lightly sprinkle the top (which will become the "inside") with BBQ seasoning or rub.
    3.  Place 1/3 cup of shredded and chopped left-over meat on the front half of the 6" round of dough.
    4.  Pull the back half of the dough gently over the meat (to make a 1/2 moon shape) and press the edges together when they meet.  Crimp the edges with a fork.
    5.  Mix the egg white and water together in a small bowl, and then brush the mixture over the filled dough.
    6.  Sprinkle a little more of the seasoning or rub over the top of the pocket sandwich.
    7.  Place on a baking sheet covered with parchment, and bake at 350 degrees until golden brown (about 20 minutes.)
    8.  Serve with barbecue or other sauce for dipping.

    Serves: 8

    I served my pulled pork pocket sandwiches with left-over cole slaw and baked beans from our party.  It was an excellent, but simple dinner for under 600 calories.


    Monday, September 12, 2011

    Perfected Pulled Pork -- Recipe

    I have been fiddling around with this pulled pork recipe for a few weeks (well, since I got a great bargain on organic pork!!)
    It is the easiest recipe ever.  Since it is made in a crock pot, you can put it together in 15 minutes before you take off for work, and dinner is ready when you get back home.

    We had a pot luck with our neighbors yesterday, and I served this dish ... everybody loved it.  Even my gluten-free friends.

    Perfected Pulled Pork

    2 large red onions
    3-4 lbs pork shoulder, pork butt or pork loin
    1-12oz can of root beer (I used diet Barq's)
    1-18oz bottle of barbecue sauce (I used Sweet Baby Rays)

    1.  Cut the red onions in half, and then slice in small strips.  Take the strips from one onion and separate and fill the bottom of your crock pot.

    2.  Take the pork and sear it on all sides to seal in the juices, and then lay it on the bed of onions in your crock pot.

    3.  Cover the pork with the separated strips from the second onion.

    4.  Pour the root beer over the pork.

    5.  Pour the barbecue sauce over the pork.

    6.  Cover the pot and set to Low (Slow Cook), and cook for 10-12 hours.  (If you are in a hurry, set the pot on high and cook for 5-6 hours)

    7.  After cooking for 12 hours, pull the pork and onions out of the pot and toss the juices left in the pot.

    8.  Take two forks and pull the pork in two directions until you get the pork shredded to small pieces.

    9.  Return pork to the crock pot and if necessary, pour in an extra 1/4 to 1/2 cup barbecue sauce.

    Nutritional Info:
    Calories  159
    Total Fat  3g
      Sat Fat  1g
      Trans Fat  0g
    Chol  41g
    Sod  411g
    Total Carbs  15g
      Diet. Fiber  0
      Sugar  14g
    Protein  17g
    Calc  0%

    I make a sandwich with those new thin 100 calorie buns, so the whole sandwich only contains 259 calories.  We also like to put a dab of low fat cole slaw on top of the meat (which I make with non-fat organic mayo, cabbage & carrot shreds, and 1/2 cup of dried cranberries.)  Even with the cole slaw, the sandwhich is less than 280 calories.

    Enjoy!!

    Monday, August 8, 2011

    How to Build a Salad that Satisfies


    With all of our veggies becoming ripe at the same time, we are eating a lot more salads.  I found this article on CalorieCount.  Now I am really ready to take on all those vegetables in our garden.

    How to Build a Salad that Satisfies
    By Brittany Mullins


    People often think of a salad as an appetizer, diet food or something that won’t fill them up for longer than an hour. This isn’t always the case. With a little planning you can make a nutritious salad that will satisfy your taste buds and keep you feeling full for hours. You don’t even need a recipe! The key to building a meal-sized salad that won’t break the calorie bank is having about three quarters of the salad be fresh vegetables and the other quarter protein and a healthy fat.

    Simply choose your favorite greens as a base and top with veggies, a protein and a healthy fat. Here’s a list of items to help you get started creating hearty, healthy and delicious salads:

    Greens:
    • Spinach
    • Arugula
    • Romaine
    • Spring mix
    • Kale
    Vegetables: (It’s best to choose veggies that are in season)
    • Tomatoes, fresh or sun-dried
    • Cucumbers
    • Zucchini or other squash
    • Mushrooms
    • Yellow, orange, red, or green bell peppers
    • Cabbage, sliced
    • Carrots
    • Beets, roasted or boiled
    • Radishes
    • Sweet corn
    • Sweet potatoes, roasted or steamed
    • Peas
    • Onion
    • Artichoke hearts
    • Roasted red peppers
    • Hearts of palm
    Protein:
    • Lean cuts of grilled or baked meat – chicken, turkey pork or beef
    • Shrimp, crab meat, scallops or other seafood
    • Salmon, tuna or other fish
    • Tofu, plain or cooked
    • Tempeh, plain or cooked
    • Edamame
    • Beans - black beans, garbanzo beans, kidney beans
    • Hummus
    • Crumbled veggie burger
    • Hard boiled eggs
    • Cottage cheese
    • Low-fat cheese
    Healthy Fats:
    • Avocado
    • Nuts (I like almonds, walnuts and pine nuts)
    • Sunflower seeds
    • Sesame seeds
    • Olive oil based dressings
    • Flax seed oil or ground flax seeds
    • Hemp seeds
    • Olive oil (and vinegar)
    • Olives
     Other Notes:
    • Don’t drench your salad in dressing. If the salad ingredients are fresh and in season they’re often very flavorful on their own.
    • Throwing leftovers on salads is the best- leftover grilled and roasted veggies (straight from the fridge) make great salad toppings.
    • Complex carbs are a fun addition as well – wheat berries, whole grain cous cous, quinoa or orzo are all great options
    • Fruits are also a great addition to salads in the summer time – try adding strawberries, blueberries, pears, and figs.
    As for preparing the salad, simply toss the ingredients of your choice into a large bowl (or small bowl for a single salad) and enjoy. You can plan ahead and prep some of the more time consuming items early. For instance you can chop veggies and cook a pot of beans on Sunday evening so weekday lunches or dinners can be thrown together in a flash. Have fun trying out the endless number of salad possibilities!
     

    Wednesday, August 3, 2011

    Yum!! Watermelon for Dessert (with recipes)

    I absolutely L-O-V-E watermelon in the summer.  I can't think of a more refreshing treat.

     MmMmMmMmmmmm water melon (sounding a little like Home Simpson!!)

    I just read in Hungry Girl's newletter that 4 cups of watermelon is only 200 calories ... yippee!!!!!

    The amino acid arginine, abundant in watermelon, might promote weight loss, according to a new study in the Journal of Nutrition. Researchers supplemented the diets of obese mice with arginine over 3 months and found that doing so decreased body fat gains by a whopping 64%. Adding this amino acid to the diet enhanced the oxidation of fat and glucose and increased lean muscle, which burns more calories than fat does. Snack on watermelon in the summer, and eat other arginine sources, such as seafood, nuts, and seeds, year-round.

    Here are three watermelon recipes for you:

    1.  Watermelon Salad
         1 bag (4oz) arugula with stems removed and roughly torn
         2 cups cubed watermelon
         1 pkg (3oz) feta cheese, crumbled
         2 Tbsp olive oil
            ground black pepper (to taste)

    In a large bowl combine watermelon, arugula and feta cheese.  Gently mix and add pepper to taste.

    Calories:  146

    2.  Watermelon Daiquiri
         3 cups watermelon chunks,  frozen with seeds and rinded removed.
         1/3 cup rum
         2 Tbsp lime juice
         1 Tbsp superfine sugar

    Blend frozen watermelon chunks, rum, lime juice an sugar.  Pour into chilled glasses.

    Calories:  183

    3.  Cherry Tomatoes with Watermelon
         1/2 pint yellow cherry or grape tomatoes
         1/2 pint red cherry or grape tomatoes
         1 small seedless watermelon, red or yellow
         1/2 tsp coriander seeds
         1/4 tsp white or red peppercorns
         kosher salt
         1 Tbsp extra virgin olive oil
         1 Tbsp slivered fresh mint leaves
         12 long thin breadsticks
         12 slices prosciutto

    Slice half of the red and yellow tomatoes in half and place in a large bowl with the remaining whole tomatoes.  Slice the melon in smaller sized cubes (or use a melon baller -- you should have about 4 cups of melon).  Add to bowl with the tomatoes.

    Crush the coriander seeds, peppercorns, and kosher salt with a mortar and pestle (or pounded with a mallet, or placed in a small coffee mill) until coarsely ground.  Sprinkle on tomatoes and melon.  Add olive oil and mint and gently toss.  Serve with breadsticks wrapped in prosciutto.

    Calories:  253


    Recipes from Prevention Magazine online.

    Monday, August 1, 2011

    Summer Strawberry Yogurt Pie

    I love summer in Oregon.  One of the biggest reasons is because of all the fresh fruits that are available, especially strawberries.  Since my birthday falls on the second day of summer, my birthday cake was always Strawberry Short Cake.  After eating a fresh strawberry short cake, we all knew that summer was finally here!  I think this recipe for Strawberry Yogurt Pie has been around for a long time, but I have just discovered it.  It is simple to make, and a real treat to eat.  And if you use frozen strawberries, you don’t even have to wait until summer to eat it!!
    Summer Strawberry Yogurt Pie
    Prep Time:  5 minutes   /   Freezer Time:  3 hours or overnight   /   Servings:  8
    2   8oz containers   strawberry flavored yogurt  (see note below)
    1   12oz container   frozen whipped topping, thawed  (see note below)
    1   cup    fresh or frozen strawberries, finely chopped  (see note below)
    1   9-inch   graham cracker crust  (see note below)
    1.  Mix yogurt with 3-1/2 cups of the dessert topping until blended.  Sweeten the strawberries, if necessary.  Mix the strawberries in with the yogurt/topping mixture, and then spoon the entire mixture into the crust.
    2.  Freeze for at least 3 hours or overnight, if possible, until it is firm.
    3.  Remove from freezer and top with remainder of dessert topping.  Store in the freezer.
    Notes: 
    1.  You can use any flavored yogurt, and then just add the same fresh, frozen or canned fruit to the mixture.  Next time I am going to try plain fat-free Greek yogurt with fresh fruit and juices.  I am thinking fresh peaches!
    2.  I used the Fat Free frozen dessert topping, and it worked out just fine.  Therefore, my frozen pie will have less calories than listed for this recipe.
    3.  I made my own graham cracker crust, but if time is a problem, a prepared graham cracker crust from the grocery store works great too.
    Nutritional Information:  Servings = 8     Serving Size – 1/8th pie
    Calories:  317      Total Fat:  18.1g      Cholesterol:  1mg      Sodium:  221mg
    Total Carbs:  36.1g  (Dietary Fiber: 0.8g)      Protein:  3.9g

    Sunday, July 31, 2011

    Farmer's Spaghetti Squash Casserole

    This is our first year growing our own vegetable garden.  Even though we were warned, we still planted too many squash and zucchini plants.  Now I am on the hunt for some good recipes.  We tried this one out tonight, and it was positively delicious.  When I make it next time though, I think I am going to toss in some roasted pine nuts for added crunch.

                           FARMER'S SPAGHETTI SQUASH CASSEROLE

    Prep Time:  20 minutes                      Cook Time:  1 hour                 Servings:  6
    3 pounds spaghetti squash, halved lengthwise and seeded
    1 Tbsp vegetable oil
    1 medium onion, chopped
    1 Tbsp garlic, minced
    1 8-oz can sliced mushrooms  (I used sliced fresh mushrooms instead)
    1 tsp dried basil  (I used fresh basil instead)
    3/4 cup sour cream  (I used non-fat sour cream.  It was 30 calories per 2 Tbsp
                                       serving less than regular regular sour cream ... so
                                       the calories in my recipe were less than shown
                                       in the nutritional information below)
    1/4 cup freshly grated Parmesan cheese
    3 slices bread, cubed  (I used ready-made croutons)

    1.  Preheat oven to 400 degrees.
    2.  Cook squash on a baking sheet in a preheated oven for 40 minutes, or until tender.  Let cool for about 5-10 minutes and then use a fork to shred the meat of the squash.  Pull the fork down from the top to the bottom, pulling the shred from the zucchini.  (Do not turn the oven off).
    3.  Transfer the shredded spaghetti squash to a lightly oiled casserole dish, discarding shell.
    4.  Heat 1 tablespoon of oil in a skillet over medium heat.  Cook and stir the onions, garlic, mushrooms, and basil until onions are translucent and tender.  Stir onion mixture and sour cream into the squash until well mixed.  Sprinkle with Parmesan cheese and cover with bread cubes.
    5.  Bake in the preheated 400 degree oven for 15 minutes, or until warmed through and top is lightly browned and toasted.
    Notes:  See notes made on individual ingredients.
    Nutritional Information:  Serving = 1/6th recipe
    Calories:  211      Total Fat:  10.6g     Cholesterol:  10mg      Sodium:  364mg
    Total Carbs:  25.9g  (Dietary Fiber: 4.8g)      Protein:  5.9g
    

    Friday, July 29, 2011

    Simple "Surprise Ingredient" Pulled Pork

    We were having friends over for dinner last night ... but I had a super crazy busy day ahead of me.  I had this recipe tucked away for my crock pot ... but I was hesitant to use it because of the surprise ingredient.  It was totally the best pulled pork I have had in a LONG time!  Two ingredients and 335 calories for the full sandwich.

    "SURPRISE INGREDIENT" PULLED PORK
    335 CALORIES -- TWO INGREDIENTS


    1 (2 pound) pork tenderloin (I used a cheaper cut actually)
    1 (12 fluid ounce) can or bottle root beer
    1 (18 ounce) bottle of your favorite barbecue sauce (mine is Sweet Baby Ray's)
    8 hamburger buns, split and lightly toasted

    1.  Heat the crock pot for a few minutes so it is warm when you put the meat in.

    2.  Place the pork tenderloin in a slow cooker;  pour the root beer over the meat.  Cover and cook on low until well cooked and the pork shreds easily, 6-7 hours. 

    3.  Pull the pork out of the crockpot and put on a large tray.  Carefully pour the contents of the crock pot out.

    4.  Take two forks and pull the pork into shreds. 

    5.  Return the pork to the crock pot, and cover with your favorite barbecue sauce.  Reheat until time to serve (at least 30 minutes to let flavors mingle.)

    Nutrition Information:  Servings = 8 sandwiches
    Calories:  335
    Fat:  5g
    Cholesterol:  49mg
    Sodium:  990mg
    Total Carbs:  49.4g
         Dietary Fiber:  1.5g
    Protein:  21.2g

    NOTES:
    1.  The true southern way to serve a pulled pork sandwich is to top it with your favorite cole slaw.

    2.  When I make this again, I am going to grill some red or sweet onions to mix into the pork 10 minutes before serving.

    3.  The actual cooking time length may vary according to individual  slow cooker.  Before taking the pork out of the crock pot to shred, double check the internal temperature of the pork with a thermometer.  The temperature should be a minimum of 145 degrees.

    Wednesday, July 27, 2011

    Simple & Delicious ... and only 229.1 Calories!!!

    I served this for dinner tonight ... and it was a major "hit" with everyone.  I didn't tell them how easy this was to make ... prep took me about 5 minutes, and it took the chicken about 20 minutes to cook up to the proper temp!!  This is a perfect recipe for a summer dinner.

    Herbed Chicken with Raspberry Balsamic Sauce


    1       teaspoon       olive oil
    1/2    cup               red onions, chopped
    1       Tablespoon  garlic, minced
    1       pinch            red pepper flakes
    1/2    teaspoon      dried thyme OR 1-1/2 tsp fresh thyme
    1/2    teaspoon      salt, divided
    4      (4-6oz)         boneless skinless chicken breasts
    1/3   cup               seedless raspberry preserves (I used low sugar raspberry preserves)
    2      Tablespoons Balsamic vinegar
    1/4   teaspoon      black pepper

    1.  Heat oil in a large nonstick skillet over medium high heat, add onion and garlic and saute 5 minutes.

    2.  Sprinkle thyme and 1/4 teaspoon of salt over chicken.

    3.  Add chicken to the skillet; saute 6 minutres on each side (or until internal temperature reaches 170 degrees).

    4.  Remove chicken from skillet and keep warm.

    5.  Reduce heat to medium, add 1/4 teaspoon salt, preserves, vinegar, and pepper to skillet, stirring until the preserves melt.

    6.  To Serve:  Spoon sauce over chicken and serve immediately Or return chicken to pan and coat chicken evenly, serve immediately.

    Nutritional Information:  (1 serving = 1 chicken breast with sauce)
    Calories:  229.1         
    Total Fat: 4.1g (Sat. Fat 0.8g)         
    Cholesterol:  72.5         
    Sodium:  433.5mg
    Total Carbohydrates:  21.7g (Dietary Fiber 0.7g, Sugars 14.9g)         
    Protein: 24.4g

    Notes: 
                 1.  If you want a thicker sauce, let it cool slightly before pouring it over the chicken.            
                 2.  I am going to try this with other no-sugar preserves to see how it works:  apricot, blackberry, peach.
                 3.  There are only 4WW points for this recipe.
                 4.  This recipe is also diabetic friendly.

    Wednesday, June 8, 2011

    Crunchy Chicken & Red Sauce with Whole Wheat Pasta (Recipe)

    This so "nummy"!!!  Tom gave it an 11 out of 10!!  (I guess he liked it!!!)  You will fall in love it this recipe too, especially when you find out how with how easy it is to fix.  This recipe started out as a party treat, Crunchy Chicken on toothpicks with red dipping sauce.  But I discovered that it is also amazing over whole wheat pasta topped with cheese!!  If you serve this dish with a simple salad with a few spritzes of spray-on salad dressing .... you have dinner for 400-450 calories!!!

    Prep: 10 minutes                              Cook Time:  15mintues                                  Servings 4
    1              pound                     Thick chicken breasts, cut into 1” pieces
    1              large                       Egg
    1              Tbsp                       Garlic, minced
    1/2           tsp                          Dijon mustard
    3/4           cups                       Panko
    1/4           cup                         Parmesan cheese, grated (I use Parmigiano-Reggiano)
    1              Tbsp                       Italian seasoning
    1              tsp                          Garlic powder
    2              cups                       Pasta sauce (I just use Prego with Meat sauce)
    2              cups                       Cooked whole wheat spaghetti
    8              Tbsp                      Part-skim mozzarella cheese, grated (I also use same cheese as above)
    1.  Preheat the oven to 350 degrees.  Coat a baking sheet with cooking spray.
    2.  Place the chicken in a large bowl.  Whisk together the egg and mustard and minced garlic in a small bowl.  Pour the egg mixture over the chicken and stir to coat all pieces.  Remove the chicken and shake off the extra egg. 
    3.  Meanwhile, combine the panko, Parmesan cheese, seasoning, and garlic powder in a large resealable plastic bag or container.  Add the chicken and shake to cover all pieces.  Remove the chicken, place on the baking sheet, and bake for 30 minutes, or until lightly browned and sizzling.
    4.  Heat the pasta sauce while the chicken is cooking.
    5.  Serve ½ cup spaghetti with one-quarter of the chicken, 2 Tbsps mozzarella cheese, and 1/2 cup pasta sauce.
    Nutrition Info:  (1/2 cup spaghetti, 8 pieces chicken, 2 Tbsp cheese, ½ cup sauce)
    Calories: 380       Total Fat: 9g (Sat Fat: 4g)     Sodium: 650mg     Carbs: 39g     Dietary Fiber: 4g    Protein: 37g     Calcium: 25%

    Friday, June 3, 2011

    Lushious Lavender Lemonade (Plus Recipe)

    I have been making tea from my Spearmint and Chocolate Mint leaves for weeks now ... but today I noticed that my lavender is about to bloom!!!!!  I love it!!!  ... Time to start making Lavender Lemonade.  So sweet, so refreshing. 

    The recipe I am posting has *white sugar in it ... but I substitute Truvia for the sugar.  I have also made it without sugar, and it is more tart, but still delicious.  If you want a quick fix for sugar-free Lavender Lemonade, buy Crystal Light Sugar Free Lemonade.  (I'm not sure, but I think it contains Equal, which I try to stay away from) then add cold water that has been infused with the lavender buds.

    Here's the recipe:

    Lavender Lemonade

    1 Tray Ice Cubes
    1/4 cup dried lavender
    2 cups boiling water
    3/4 cups white sugar*
    8 lemons
    5 cups cold water (or as needed)

    1.  Place ice cubes into a 2 quart pitcher.  Place the lavender into a bowlm, and pour boiling water over it.  Allow to steep for about 10 minutes, then strain out the lavender and discard. Mix the sugar into the hot lavender water, then pour into the pitcher with the ice.

    2.  Squeeze the juice from the lemons into the pitcher, getting as much juice as you can.  Top off the pitcher with cold water, and stir.  Taste and adjust lemon juice or sugar if desired.  Pour into tall glasses.  For guests, top with a fresh sprig of lavender.

    Note:  If you are not growing your own lavender, be sure the lavender you buy if "food grade" and not sprayed etc.

    Nutritional Info (1/6th recipe with white sugar):  Calories: 127, Fat: 0.5g, Chol: 0mg, Sodium: 15mg, Carbs: 40.7g, Dietary Fiber: 7g, Protein: 1.8g