About Me

My photo
Former teacher, clinical social worker and now entrepreneur. My focus, no matter what career I am engaged in, has been on helping people. Now I am on an incredible journey to change life in a leaner, cleaner, greener way. I hope you will join me in this transition.
Showing posts with label planting. Show all posts

Friday, July 12, 2013

Special Friends in the Garden!!!

Here is a great chart to determine friendly companions and not so friendly companions in the garden from The Yarder Facebook Page and One Creative Mommy's web site.


Thursday, April 18, 2013

Reusing Bottles in the Garden

Architecture Art Designs just published an article called 45 Ways to Recycle Bottles.  Here are pictures of my two favorite ideas.

Recycled Bottle Planters


Recycled Bottle Sprinkler/Sprayer


Wednesday, April 3, 2013

No Room for a Garden? - Try This Table-Top Idea

I found this article in Sunset Magazine.  Even though we have space for a garden, I think this would be a fun idea for planting all of our salad greens on the deck. That way we can just go out in the evening and "cut our dinner!!"  How fresh can you be?!?!?!

Image from Sunset Magazine

Step 1 – Choose Your Veggies (Note: Use this guide to grow herbs, strawberries and flowers in your container garden too.)
What do you want to grow in your container veggie garden? The only rule is to choose vegetables that you actually like to eat – it’s one of the benefits of being a grown-up. There are many varieties of vegetables that have been developed especially for container gardening. Look for descriptive words like “bush,” “compact” or “dwarf” when buying vegetable seeds or transplants (small plants ready to put directly into the garden). It’s fun to start seeds indoors yourself (or in a mini greenhouse) about 8 weeks before it is expected to be warm enough to transplant them outside into your containers.
 
Tip: Plan to plant an extra pot or two of veggies to share with your friends.

Step 2 – Choose Your Veggie Planters

Gardening in containers is easy (you don’t need a PhD from a horticulture university to be successful – all you need is a little basic knowledge) but one of the most important factors in your gardening success is choosing appropriate garden planters. Nearly all vegetables and herbs will do well in a 5-gallon pot (12″ diameter and 12″ depth) but plants with shallow roots, like salad greens, will grow well in 6-8 inches of depth.

Use light colored pots for veggies that prefer cool temperatures (like lettuce and cabbage) and dark colored planters for heat loving plants (like tomatoes). For tall growing plants, choose pots made of heavy material like terracotta or add a layer of clean sand to the bottom of the planter for added weight and planter support.

Choose colors and styles of planters that compliment your house and yard. There is a large selection of beautiful garden planters available to suit any taste and budget. Consider self-watering garden planters for extra convenience and a sure water supply for thirsty plants on hot summer days. Some plants will do best if supported by a trellis or stake attached to the garden planter.

Tip: Share the fun and help a friend get started in veggie gardening.

Step 3 – Add Soil to Your Containers
The soil for vegetables that are grown in containers must be lightweight, loose, and hold moisture well. Regular soil is too heavy, compacts easily and should never be used in planters. It is important to choose a “soil-less” soil mix developed specifically for gardening in containers. These soils are various mixtures of vermiculite, perlite, peat moss and other nutrients.

The soil can be reused the following year by adding special soil boosters that replenish lost nutrients that vegetables require. Another benefit of using lightweight soil is that your planters will be easy to move around – one of the main advantages of container gardening is its portability.

Now for the fun part. The next step in our container gardening guide is…
 Step 4 – Plant Your Veggie Garden

Follow the directions on the seed package to determine the best time for planting in your area based on your gardening hardiness zone. Use a zone finder tool to determine your zone by zip code and be sure to make a note of your zone number.

Many gardeners will sow seeds directly into garden planters for quick growing veggies like greens, but purchase transplants for longer maturing vegetables like tomatoes. After planting your seeds, spray soil lightly with a mister and cover pot with plastic wrap to retain moisture and warmth. Keep the soil moist at all times. When the seeds sprout, remove the plastic cover but continue to water very gently – remember they are baby veggies and need loving care.

Other information about the plant’s requirements (spacing, etc..) can be found on the seed package. Try to give each plant the conditions that they prefer. This is easy to do with container gardening – you control all of the environmental factors (soil, sun, water etc…).

Tip: Remember to add your favorite herbs, small fruits (like strawberries) and flowers (nasturtiums and dwarf marigolds are nice) to your veggie planters.

Bonus tip: Plant salad greens around the base of your tomato plant. By the time the tomato plant in the center needs the space you will have harvested the greens.

Step 5 – Fertilize and Water Veggies

Your veggies need to be watered daily and fertilized on a regular basis. Fertilizer is the key to abundant produce and healthy plants. Fertilizer replenishes the nutrients that plants need and that are washed away every time you water your containers. For best results look for complete organic fertilizers that are recommended especially for container gardening and fertilize according to the package directions.

Avoid using liquid fish emulsion fertilizer – cats and raccoons love the smell. (A special note about herbs: Herbs need less fertilizer than vegetables. So after the initial planting, you will not need to add fertilizer again.)

Watering must be done daily and more often on extremely hot summer days when the planter soil is likely to dry out quickly. Be sure you have free flowing drainage holes in your garden planter. Elevate veggie planters on bricks or wood to allow drainage and to protect surfaces. Consider watering aids and time-savers like self-watering planters, water-holding crystals that are added to the soil mix, and drip-irrigation systems designed especially for gardening in containers.

Tip: Put a layer of peat moss on top of the soil in each planter to help retain moisture.

Step 6 – Give Your Veggies Sunshine
Most vegetables require 6 hours of sunlight daily. Leafy vegetables like lettuce will do fine with somewhat less light. If necessary, putting planters on casters makes it easy to move your plants from areas of limited light to more sunny areas. Group pots of heat-loving veggies together in the warmest spot on your patio and cluster vegetables that prefer cooler temperatures in areas that are sheltered from the hot afternoon sun.
Garden design is a great opportunity to create a garden that is productive, creates useful extensions of your living space and is pleasing to look at. A potting bench can even be used as an outdoor buffet for family dining on the patio or deck.
Tip: Get your kids involved in gardening. Even kids that don’t like veggies will eat the baby carrots they grew themselves.
Step 7 – A Daily Gardening Schedule
Your new vegetable garden is very low maintenance requiring few supplies or tools, but you will need to water daily, fertilize regularly and be sure to harvest your veggies and berries as they ripen (the fruit of your labor). Herbs can be snipped and used as needed, either fresh or dried.
Most important of all, is to enjoy the time you spend in your garden – getting your hands in the soil and working with nature is relaxing and also provides a satisfying sense of accomplishment.
Tip: An attractive planter of salad greens or herbs makes a healthy and thoughtful gift.
It’s that easy. You’ll soon discover that there is nothing like the taste of fresh, just-picked vegetables from your own thriving container garden.

Monday, April 1, 2013

Our Pea Pickin' Bucket Garden

This was one of our projects this weekend.


How We Built Our Bucket Garden

1. Buy some 5 gallon buckets.  They are cheap at Home Depot and Lowes (Just depends on if you want orange or blue buckets).

2. Drill drainage holes in the bottom and fill as you would any planter.  Then plant your seeds or transplants.

3.  For each set of hanging gardens, be bought 5 8-foot metal fence posts.

4. Pound the posts into the ground at an angle and secure where the two posts cross with wire or string.

5.  Slip the 5th fence post between the two notches.  Now it is ready to hold your buckets.

We started our garden with peas, but we are also going to use this technique for our tomatoes and beans.  We could do strawberries too, but we have something special in mind for them.

Thursday, March 28, 2013

The Three Sisters

This is the way Tom plans to plant at least a few hills of corn, beans and squash. He calls them the "Three Amigos," but it is the same Native American technique for planting.

This tip come from The Book of Three Web Site.


Image from the Book of Three Website

The ancient Native American technique of growing Corn, Beans, and Squash together in an arrangement called the Three Sisters is the ultimate in companion planting and helps increase harvests, naturally!
 
Corn acts as a support for climbing bean vines, the beans fix nitrogen in the soil for the high feeding requirements of corn and squash, and the squash provides mulch and root protection for the corn and beans! After cooperating beautifully in the garden, corn and beans form a complete protein when eaten together! How's that for a mutually beneficial relationship?
 
The Three Sisters are all easy to direct sow in the garden and are a great project for children, teaching them about the beauty of natural harmony while providing a fast-growing reward for their efforts.
 
Make the best possible use of your garden space this season, and try growing the Three Sisters! Just follow the easy steps listed below, fertilize well, plant other companions like herbs to assist with pest control, and you'll be harvesting your best crop in no time!
 
Planting instructions
 
In May or June when soil has warmed:
Shape a flat-topped circular mound of soil about a foot high and 2 feet across at the top, sloping outward toward the base. Plant a circle of Corn seeds on top, about 5 or 6, and water them in well, tamping down your soil mound firmly so it doesn't wash away in the first rain. Space the mounds 3 or 4 feet apart in the garden.
 
Since all corn grows on sturdy, dependable stalks, the variety you choose depends on the flavor, disease resistance, and holding ability you want. Sugar Buns is a Sugar Enhanced (SE) yellow hybrid with absolutely scrumptious golden kernels and is positively scrumptious. For SE whites, you can't beat Silver Princess, with extra-long ears bursting with flavor. And for the sweetest ears yet, you absolutely must try new Corn Mirai™, available in Yellow, White, Bicolor, and even a Mini!
 
About two weeks later:
When your corn reaches about 5 or 6 inches high, plant Bean seeds (6 to 8 of them) around the edges of the flat top or about halfway down the sloping sides of the circular mound. Push the seeds down deep into the soil and, if you're planting on the slope, make sure the soil is nice and firm. Add a bit of Nature's Aid at planting time to help the Beans fix nitrogen.
 
To get your Beans to climb up the cornstalks, choose Pole rather than Bush varieties. Smeraldo is far and away the best-tasting Pole Bean, with flat pods up to 10 inches long on vigorous 4- to 6-foot vines. Park gardeners rave about Kwintus, a super-early performer with succulent pods on stringless 8- to 10-inch pods. And Blue Lake is the classic name in Beans, with top-quality dark green pods that are both stringless and fiberless, even if you pick them a bit late. We even have Blue Lake available in organic seed!
 
One week or so after that:
Plant Squash seeds around the base of the mound, on flat ground. You can make them radiate around the mound, or just go in the direction you have available space! 6 to 8 seeds in a ring around the base of the mound is usually plenty.
 
The traditional Squash family member for this Sister is Pumpkin, with its all-American flavor and long growing season. Rumbo is a unique Korean variety that looks like an heirloom Pumpkin but tastes sweeter and more succulent than a Butternut Squash! For a quicker harvest, grow Summer Squash varieties such as organic Park's Early Summer Crookneck or Zucchini such as space-saving One Ball Hybrid.
 
When everything begins growing:
Thin the plantings to 2 or 3 Corn stalks, each with no more than 2 Bean plants winding around it. (You'll need to help the Beans get started growing up the stalks). The Squash is going to vine along the ground, so the number of plants you need depends on how far apart your mounds of corn and beans are, how long the vines get, and how much walking space you need in the garden.

Garden in a Bale of Straw

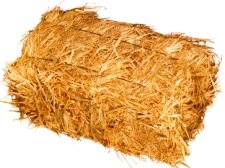
straw bale for gardening
Limited space? No soil? Toxic or rocky ground? Spare corner? Edge of drive way or yard? Here's bales of advice for you on the straw bale gardening.

Straw bale, or hay bale gardening is not to be confused with using loose straw in your garden for mulch or compost.  What we're talking about here is the whole bale, as it stands, tied with twine and used for planting plants on the top.

The bale is the garden. Put it on your balcony or path if you want to. Use one or umpteen bales of straw or hay as you need and in any pattern. Because the straw bale garden is raised, it's easy to work with, so make sure you allow for handy access.

Which straw to use for straw bale gardening? The best straw bales, for a garden are wheat, oats, rye or barley straw. These consist of stalks left from harvesting grain, they have been through a combine harvester and had the seeds threshed from them, leaving none or very few left.

Hay bales for gardening are less popular as they have the whole stalk and seed heads with many seeds.  They also often have other weeds and grass seeds to cause trouble. Use what you can get locally--it may even be lucerne, pea straw, vetch or alfalfa bales. Corn and linseed (flax) bales are not so good as they are very coarse, and linseed straw take a long time to decompose due to the oil residue left on the stalks.

It's simple to pull out the odd wayward grain seeds with straw bale gardening, but hay hales have a tendency to grow the likes of a small lawn! Thus you may need to occasionally give them a haircut rather than try to pull the tenacious new sprouts out. Hay bale gardening has one up on straw in that it is a nice warm and rich environment with enough nitrogen to continually supply growing plants. Straw is mostly carbon and so nitrogen must be added for plant growth (see information below).

Where to buy straw bales for garden? Most garden supply centers and nurseries sell straw bales. Farmers are you next bet if you live in the country. Also try animal breeding places and stables as they often buy straw bales in bulk for bedding and may sell you one.

How much do straw bales cost? Straw bales costs vary from country to country, but your cheapest option is usually going to a farm where you could be lucky at $1.00 per bale. Otherwise prices range from $2-$3 per bale. Still good value for an instant little garden!

Arranging your straw bale garden. Put each bale in the exact place, because it's hard to even nudge these monsters once you've got your little straw bale garden going.

Just like a normal vegetable garden your straw bale plants need sun, 4-8 hours if possible, depending on your choice of plants. Leafy greens and some herbs need slightly less sun than vines and tomatoes for example. 

A very popular idea for hay bales and straw bales is to make a raised garden bed with the bales as the edge. This limits excessive evaporation from both the garden in the middle and one side of the bale.

If you are starting a no-dig garden and don't have enough filling to begin with before your compost, kitchen scraps, grass clippings, leaves, mulch or whatever you have, are not ready, then a cheap way for the first year is to buy bales and with a little bit of compost on the top, and a few other ingredients mentioned here, you can get your garden going the first year.

Deter those darn digging moles, gophers, rats or whatever thieves populate your area, by first laying down galvanized wire bird netting before laying your bales down. Lay the bales lengthwise to make planting easy by just parting the pads of straw.

There are two options on which side to lay straw bales:

1. Make sure the string is running around each bale and not on the side touching the ground in case its degradable twine such as sisal. The straw is now vertical, cut ends up. This means when you water , much of it will go straight through the bale and wash away.

2. Laying your bale or bales with the twine touching the ground (as long as it's plastic or wire twine of course), means that the straw stalks are horizontal and water will more likely soak in and not flow through the bale and be wasted.

This method of laying down your straw bale lends itself to using a soaker hose better than the vertical way.  If using a soaker hose, which are marvelous by the way, lay it under the twine to stay in place. The steady slow drips of water will find it hard to escape through channels, unlike the vertical method whereby the water channels downwards.

Starting your straw bale garden.  If you start with aged bales of about 6 months or more, they may already have been through their initial weathering and starting to decompose slightly inside.  If they have been wet at all they almost certainly would have lost their cool and done their cooking.

If not and they are still new or in pristine condition, they need to do a bit of stewing before it's safe to plant in them.  Thoroughly soak with water and add more water so they don't dry out at all for the next 5 days whilst the temperature rises and cooks them inside.  Slowly they will cool over the next 1-2 weeks and then be ready for planting.

You can plant when the bales are still warm( which promotes root growth). The bales won't be composting much inside yet, that takes months, but you don't want that initial hot cooking of your plants.

Some sneaky people speed up the process of producing microbes and rot by following a 10-day pre-treatment regime of water and ammonium nitrate on the top of each bale. But, hey, organic gardeners are a patient lot aren't we, so let's follow nature. Just so you know, the chemical ammonium nitrate (AN) acts as a catalyst. It is high in nitrogen and encourages and feeds microbes which rot the straw so plants can grow.

More natural ways that help speed up that all important burn out, are to spread on a high nitrogen organic fertilizer just before you start your watering process and watered in each day as detailed above. Remember though that this fertilizing along with the initial soaking will mean that the bales will continue to cook longer and you will have to wait before planting. It ultimately provides a better base and growing conditions and saves you having to be so worried about getting nutrients to your plants as they start growing.

Some materials that can be used are:

   * A 3cm (1') layer of fresh chicken manure - double that if aged chicken manure, or
   * Other suitable manures such as turkey or rabbit - 5mc (2") layer, or
   * A covering layer of 2/3 bone meal to 1/3 blood mean, or
   * A very thick layer of milder stuff such as spent coffee grounds.

Also to balance the growing medium, add potassium by sprinkling on a handful of sulphate or potash.

 
Watering a straw bale garden. Keep watered. That's going to be your biggest task -- twice a day if necessary. Straw bale gardening uses more water than a normal garden, so set up a system now. It may be that hauling out the teapot on each day is enough in your area, or you may need to keep the hose handy. A soaker hose system set in place is perfect.

Anything you can put on the exposed sides of your straw bales will help conserve water and stop them drying out in the sun. Low bushes or herbs, planks or bricks and so on will work. If you have some plastic and don't mind the unnatural look in your garden, then put that around the sides. Keep the twine there to hold it all in place for a long as possible.

What plants to plant? Annuals of vegetables, herbs or flowers will love your straw bale. Remember your bales will be history in 1-2 years. Young plants can go straight in. Pull apart or use a trowel and depending on the state of the straw, put a handful of compost soil in too, then let the straw go back into place.

Seeds can be planted on top if you put a good 5cm (2") layer of compost soil there first. Top heavies like corn and okra are not so good unless you grow dwarf varieties. With straw bale gardening it's hard to put solid stakes in so big tomato plants are out, although they will happily dangle over the edge.

Each bale should hold:

   * Up to half a dozen cucumbers, trailing down, or
   * Squash, zucchini, melons -- maybe 3 plants, or
   * A couple of tomato plants per bale with one or two herbs and leafy veggies in between, or
   * Four pepper plants will fit, or
   * 12-15 bean or pea plants, or
   * A mix of the above or any other plants you like.

Since there's no limit and why not poke in around the side some flower annuals for color and companionship if you like.

Once a week or more often when your plants are in full growth water in a liquid organic feed, such as compost tea or fish emulsion. Add some worms on top if you want to use your bales only one season. If you are using hay bales instead of straw bales, the liquid feed can be spaced much further apart because hay bales have more nutrient dense environment.

You'll get one good season out of a hay bale garden, and usually two with a straw bale, albeit with a bit of sag. It make s for great compost or mulch when finished with.


- See more at: http://www.no-dig-vegetablegarden.com/straw-bale-gardening.html#sthash.PkoZhaop.dpuf


Monday, March 25, 2013

How to Trellis Tomatoes

I can never get those tomato cages to work for me. I tried the Topsy-Turvy one year and dumped the tomatoes all over the ground ... maybe I will try this method for staking up my tomatoes this year.

Trellis like a Pro
by Sandy Swegel


My tomatoes are only a few inches tall and still indoors, but this is the ideal time to start thinking about how to trellis them. For years I fiddled with the dinky round tomato cages sold everywhere that just fall over when faced with a large indeterminate tomato. One year I even tried tying two cages on top of one another and it still fell over.

Market Farmers don't use wussy home-gardening-type trellises. They bring out the T-Posts and plastic baling twine orstring. (This is one time you can't use natural twines like jute or cotton...they are too stretchy.) The most common technique is called the Florida Weave.


Basically, you place tall (7 foot min) T-posts at each end of your tomato row. Every two or three plants, add a stake (or another T post). You will then “weave” the twine around the T-posts and tomatoes in a basic figure-eight shape. T-posts are super sturdy and stay put once you pound them into the ground. Ideally, you can string the T-posts before the tomatoes are tall or perhaps even planted. As the tomatoes grow you can tuck the growing edge into one of the rows of string. The beauty of the Florida Weave is that even if you are late getting your trellising in place, you can still do a pretty good job pulling up the overgrown tomatoes.


Photo Credits and More Info:
http://www.specialtycrops.colostate.edu/techniques/trellis.htm#tomatoes
http://www.foogod.com/~torquill/barefoot/weave.html
http://www.organicgardening.com/learn-and-grow/cat-s-cradle-tomatoes
http://www.finegardening.com/how-to/articles/supporting-cast-for-tomatoes.aspx

Wednesday, March 13, 2013

The Couch Potato's Guide to Growing Spuds


Image from sweetlifegarden.com
 
I am so excited.  We are buying our potato “seeds” this weekend and a-planting-we-will-go!!  We have decided on German Butterball, Yukon Gold, Sangre (red potato), Russian Banana (fingerling) and Georgia Jet (sweet potato).
Potatoes are about the easiest crops to grow. You can even grow them in a bag of potting soil, without really dirtying your hands. To do that, cut a few drainage holes at the bottom of a bag of potting soil, then stand the bag someplace sunny. Bury two "seed potatoes"  about 4 inches deep, and wait about 3 months for them to grow. When flowers start to appear, tip the bag over and dig out the potatoes. To keep the harvest going long into the fall, plant a new set of seed potatoes every few weeks.
Here is a great article from Organic Gardening Magazine on other ways to plant those spuds!!
Hilled Rows
Dig straight, shallow trenches, 2 to 3 feet apart, in prepared soil. Plant seed potatoes 12 inches apart and cover with about 3 inches of soil. When the shoots reach 10 to 12 inches tall, use a hoe or shovel to scoop soil from between rows and mound it against the plants, burying the stems halfway. Repeat as needed through the growing season to keep the tubers covered.
Pros: No containers to buy or build; no soil to transport. This is a simple, inexpensive, and proven method that farmers have used for millennia. Practical for large-scale plantings.
Cons: Yield may be limited by the quality of the soil. In places where the soil is badly compacted or low in organic matter, one of the aboveground techniques might work better.
Straw Mulch
Place seed potatoes on the surface of prepared soil, following the spacing specified for hilled rows, and cover them with 3 to 4 inches of loose, seed-free straw. Mound more straw around the stems as they grow, eventually creating a layer a foot or more in depth.
Pros: The thick mulch conserves soil moisture and smothers weeds. Harvest is effortless with no digging. This method is suggested as a way to thwart Colorado potato beetle.
Cons: Yield in the test plot was slightly less than in the hilled row. Field mice have been known to use the cover of straw to consume the crop.
Raised Bed
Loosen the soil in the bottom of a half-filled raised bed. Space seed potatoes about 12 inches apart in all directions and bury them 3 inches deep. As the potatoes grow, add more soil until the bed is filled. If possible, simplify harvest by removing the sides.
Pros: This method yielded the largest harvest in my trials, and the potatoes were uniformly large. Raised beds are a good choice where the garden soil is heavy and poorly drained.
Cons: The soil to fill the bed has to come from somewhere—and it takes a lot.
Grow Bag
Commercial growing bags are constructed of heavy, dense polypropylene. Put a few inches of a soil-compost mixture in the bottom of a bag, then plant 3 or 4 seed potato pieces and cover with 3 inches of soil. Continue adding soil as the plants grow until the bag is filled. To harvest, turn the bag on its side and dump out the contents.
Pros: Grow Bags can be placed on patios or driveways or used where garden soil is of inferior quality. The bags should last for several growing seasons. Their dark color captured solar heat to speed early growth. Harvest was simple, and the yield was impressive, considering the small space each bag occupies.
Cons: This is a pricy technique. The brand of bag I used costs $12.95.
Garbage Bag
Plant a large plastic garbage bag following the instruction for a Grow Bag, punching a few holes through the plastic for drainage. Roll the top edge of the bag to help it stay upright; otherwise the bag is prone to sag and spill soil. To harvest, rip the bag and dump out the contents.
Pros: Like the Grow Bags, a garbage bag can be employed where in-ground growing is not an option. Black bags capture solar heat to speed early growth.
Cons: Aesthetically, this is the least appealing choice. Yield was meager, perhaps because the thin plastic allowed the soil to heat up too much, limiting tuber formation.
Wood Box
Following instructions found online at Irish Eyes Garden Seeds Website, build a bottomless square box (I used lumber from discarded pallets). Plant the same as for a raised bed. The box is designed so additional slats can be screwed to the sides as the plants grow and soil is added. In theory, a bottom slat can be temporarily removed to facilitate the harvest of new potatoes. For the final harvest, tip the box and dump out its contents.
Pros: This is another raised strategy for growing potatoes where the garden soil is of poor quality. Yield was similar in quantity to that of a raised bed.
Cons: A lot of time and effort went into the construction of the box. I felt the results did not justify the effort.
Wire Cylinder
Using hardware cloth with ¼-inch mesh, fashion a cylinder about 18 inches in diameter and 24 inches tall. Put several inches of soil in the bottom, then plant 3 or 4 seed potatoes and cover them with 3 inches of soil. Continue to add soil as the potatoes grow. To harvest, lift the cylinder and pull the soil back to expose the tubers.
Pros: In a climate with incessant spring rains, the wire mesh would provide excellent drainage and prevent the soil from becoming waterlogged. This is another raised technique to consider where garden soil is poor.
Cons: I harvested a limited number of undersized tubers from the cylinders—a dismal showing, probably because the soil-compost mixture I used dried out so quickly that the plants lacked adequate moisture.

Tuesday, March 12, 2013

Seed Starting Chart


If you are like Tom and me, you can't wait to get your seeds into the ground.  Here is a great little chart from the Knowledge Weighs Nothing Website to let you know when to grab your trowel and start planting.