About Me

My photo
Former teacher, clinical social worker and now entrepreneur. My focus, no matter what career I am engaged in, has been on helping people. Now I am on an incredible journey to change life in a leaner, cleaner, greener way. I hope you will join me in this transition.
Showing posts with label vegetables. Show all posts

Friday, July 12, 2013

Special Friends in the Garden!!!

Here is a great chart to determine friendly companions and not so friendly companions in the garden from The Yarder Facebook Page and One Creative Mommy's web site.


Tuesday, April 23, 2013

All Natural Ways to Control Slugs


Tom hates always giving up his beer to battle slugs …. Just kidding!! … Here are eight ways to stop those little critters in their tracks.

All Natural Ways To Control Slugs from The Funtime Guide.

1. Beer: Those pesky slugs hold their alcohol like a 12-year-old girl. Ideal Bite has some clever thoughts on using beer traps for natural slug control… including the “one for you, one for me” approach. Ha!
2. Egg Shells: Mother Earth News recommends crushing up egg shells and sprinkling them around your plants. Obviously the egg shells will also benefit the soil as they decompose… so they provide double the benefit.

3. Diatomaceous Earth: Diatoma what? Diatomaceous earth is basically the natural fossilized remains of diatoms, a type of hard-shelled algae. Just as with egg shells, soft-bodied pests (like slugs and snails) will not crawl over it… for the same reason humans won’t walk on broken glass.

4. Sandpaper: Just as with egg shells and diatomaceous earth, rough sandpaper is too painful for the slugs to cross.

5. Citrus Rinds: Planet Green recommends using upside down halves of grapefruit rinds as a slug traps. Set them out at night and you’ll have slugs up inside them in the morning. Personally i’m not a big fan of the trapping techniques as I don’t really want to have to see and dispose of the slugs… they disgust me. Blah!

6. Seaweed: EarthEasy.com says, “If you have access to seaweed, it’s well worth the effort to gather. Seaweed is not only a good soil amendment for the garden, it’s a natural repellent for slugs. Mulch with seaweed around the base of plants or perimeter of bed. Pile it on 3″ to 4″ thick – when it dries it will shrink to just an inch or so deep. Seaweed is salty and slugs avoid salt. Push the seaweed away from plant stems so it’s not in direct contact. During hot weather, seaweed will dry and become very rough which also deters the slugs.” Be sure to check out EarthEasy’s list of natural slug repellents. You’ll find some of the same and some different methods than what we’re talking about here.

7. Organic Baits: The Weekend Gardner web magazine recommends using either Sluggo or Escar-Go. How do they work? Iron phosphate. Weekend Gardner says, “Iron phosphate is an organic compound that is found naturally in the soil, and if the bait is not consumed by a slug or snail, the material breaks down into fertilizer for your soil. Iron phosphate is not volatile, and does not readily dissolve in water, which minimizes its dispersal beyond where it is applied.”

8.Companion Planting: I didn’t know about companion planting when we planted our garden, but I’ll definitely be using it next year. Basically, certain plants planted near each other benefit each other and may also deter certain pests. Plants that deter slugs are: wormwood, rue, fennel, anise, and rosemary.

Wednesday, April 3, 2013

No Room for a Garden? - Try This Table-Top Idea

I found this article in Sunset Magazine.  Even though we have space for a garden, I think this would be a fun idea for planting all of our salad greens on the deck. That way we can just go out in the evening and "cut our dinner!!"  How fresh can you be?!?!?!

Image from Sunset Magazine

Step 1 – Choose Your Veggies (Note: Use this guide to grow herbs, strawberries and flowers in your container garden too.)
What do you want to grow in your container veggie garden? The only rule is to choose vegetables that you actually like to eat – it’s one of the benefits of being a grown-up. There are many varieties of vegetables that have been developed especially for container gardening. Look for descriptive words like “bush,” “compact” or “dwarf” when buying vegetable seeds or transplants (small plants ready to put directly into the garden). It’s fun to start seeds indoors yourself (or in a mini greenhouse) about 8 weeks before it is expected to be warm enough to transplant them outside into your containers.
 
Tip: Plan to plant an extra pot or two of veggies to share with your friends.

Step 2 – Choose Your Veggie Planters

Gardening in containers is easy (you don’t need a PhD from a horticulture university to be successful – all you need is a little basic knowledge) but one of the most important factors in your gardening success is choosing appropriate garden planters. Nearly all vegetables and herbs will do well in a 5-gallon pot (12″ diameter and 12″ depth) but plants with shallow roots, like salad greens, will grow well in 6-8 inches of depth.

Use light colored pots for veggies that prefer cool temperatures (like lettuce and cabbage) and dark colored planters for heat loving plants (like tomatoes). For tall growing plants, choose pots made of heavy material like terracotta or add a layer of clean sand to the bottom of the planter for added weight and planter support.

Choose colors and styles of planters that compliment your house and yard. There is a large selection of beautiful garden planters available to suit any taste and budget. Consider self-watering garden planters for extra convenience and a sure water supply for thirsty plants on hot summer days. Some plants will do best if supported by a trellis or stake attached to the garden planter.

Tip: Share the fun and help a friend get started in veggie gardening.

Step 3 – Add Soil to Your Containers
The soil for vegetables that are grown in containers must be lightweight, loose, and hold moisture well. Regular soil is too heavy, compacts easily and should never be used in planters. It is important to choose a “soil-less” soil mix developed specifically for gardening in containers. These soils are various mixtures of vermiculite, perlite, peat moss and other nutrients.

The soil can be reused the following year by adding special soil boosters that replenish lost nutrients that vegetables require. Another benefit of using lightweight soil is that your planters will be easy to move around – one of the main advantages of container gardening is its portability.

Now for the fun part. The next step in our container gardening guide is…
 Step 4 – Plant Your Veggie Garden

Follow the directions on the seed package to determine the best time for planting in your area based on your gardening hardiness zone. Use a zone finder tool to determine your zone by zip code and be sure to make a note of your zone number.

Many gardeners will sow seeds directly into garden planters for quick growing veggies like greens, but purchase transplants for longer maturing vegetables like tomatoes. After planting your seeds, spray soil lightly with a mister and cover pot with plastic wrap to retain moisture and warmth. Keep the soil moist at all times. When the seeds sprout, remove the plastic cover but continue to water very gently – remember they are baby veggies and need loving care.

Other information about the plant’s requirements (spacing, etc..) can be found on the seed package. Try to give each plant the conditions that they prefer. This is easy to do with container gardening – you control all of the environmental factors (soil, sun, water etc…).

Tip: Remember to add your favorite herbs, small fruits (like strawberries) and flowers (nasturtiums and dwarf marigolds are nice) to your veggie planters.

Bonus tip: Plant salad greens around the base of your tomato plant. By the time the tomato plant in the center needs the space you will have harvested the greens.

Step 5 – Fertilize and Water Veggies

Your veggies need to be watered daily and fertilized on a regular basis. Fertilizer is the key to abundant produce and healthy plants. Fertilizer replenishes the nutrients that plants need and that are washed away every time you water your containers. For best results look for complete organic fertilizers that are recommended especially for container gardening and fertilize according to the package directions.

Avoid using liquid fish emulsion fertilizer – cats and raccoons love the smell. (A special note about herbs: Herbs need less fertilizer than vegetables. So after the initial planting, you will not need to add fertilizer again.)

Watering must be done daily and more often on extremely hot summer days when the planter soil is likely to dry out quickly. Be sure you have free flowing drainage holes in your garden planter. Elevate veggie planters on bricks or wood to allow drainage and to protect surfaces. Consider watering aids and time-savers like self-watering planters, water-holding crystals that are added to the soil mix, and drip-irrigation systems designed especially for gardening in containers.

Tip: Put a layer of peat moss on top of the soil in each planter to help retain moisture.

Step 6 – Give Your Veggies Sunshine
Most vegetables require 6 hours of sunlight daily. Leafy vegetables like lettuce will do fine with somewhat less light. If necessary, putting planters on casters makes it easy to move your plants from areas of limited light to more sunny areas. Group pots of heat-loving veggies together in the warmest spot on your patio and cluster vegetables that prefer cooler temperatures in areas that are sheltered from the hot afternoon sun.
Garden design is a great opportunity to create a garden that is productive, creates useful extensions of your living space and is pleasing to look at. A potting bench can even be used as an outdoor buffet for family dining on the patio or deck.
Tip: Get your kids involved in gardening. Even kids that don’t like veggies will eat the baby carrots they grew themselves.
Step 7 – A Daily Gardening Schedule
Your new vegetable garden is very low maintenance requiring few supplies or tools, but you will need to water daily, fertilize regularly and be sure to harvest your veggies and berries as they ripen (the fruit of your labor). Herbs can be snipped and used as needed, either fresh or dried.
Most important of all, is to enjoy the time you spend in your garden – getting your hands in the soil and working with nature is relaxing and also provides a satisfying sense of accomplishment.
Tip: An attractive planter of salad greens or herbs makes a healthy and thoughtful gift.
It’s that easy. You’ll soon discover that there is nothing like the taste of fresh, just-picked vegetables from your own thriving container garden.

Monday, April 1, 2013

Our Pea Pickin' Bucket Garden

This was one of our projects this weekend.


How We Built Our Bucket Garden

1. Buy some 5 gallon buckets.  They are cheap at Home Depot and Lowes (Just depends on if you want orange or blue buckets).

2. Drill drainage holes in the bottom and fill as you would any planter.  Then plant your seeds or transplants.

3.  For each set of hanging gardens, be bought 5 8-foot metal fence posts.

4. Pound the posts into the ground at an angle and secure where the two posts cross with wire or string.

5.  Slip the 5th fence post between the two notches.  Now it is ready to hold your buckets.

We started our garden with peas, but we are also going to use this technique for our tomatoes and beans.  We could do strawberries too, but we have something special in mind for them.

Thursday, March 28, 2013

The Three Sisters

This is the way Tom plans to plant at least a few hills of corn, beans and squash. He calls them the "Three Amigos," but it is the same Native American technique for planting.

This tip come from The Book of Three Web Site.


Image from the Book of Three Website

The ancient Native American technique of growing Corn, Beans, and Squash together in an arrangement called the Three Sisters is the ultimate in companion planting and helps increase harvests, naturally!
 
Corn acts as a support for climbing bean vines, the beans fix nitrogen in the soil for the high feeding requirements of corn and squash, and the squash provides mulch and root protection for the corn and beans! After cooperating beautifully in the garden, corn and beans form a complete protein when eaten together! How's that for a mutually beneficial relationship?
 
The Three Sisters are all easy to direct sow in the garden and are a great project for children, teaching them about the beauty of natural harmony while providing a fast-growing reward for their efforts.
 
Make the best possible use of your garden space this season, and try growing the Three Sisters! Just follow the easy steps listed below, fertilize well, plant other companions like herbs to assist with pest control, and you'll be harvesting your best crop in no time!
 
Planting instructions
 
In May or June when soil has warmed:
Shape a flat-topped circular mound of soil about a foot high and 2 feet across at the top, sloping outward toward the base. Plant a circle of Corn seeds on top, about 5 or 6, and water them in well, tamping down your soil mound firmly so it doesn't wash away in the first rain. Space the mounds 3 or 4 feet apart in the garden.
 
Since all corn grows on sturdy, dependable stalks, the variety you choose depends on the flavor, disease resistance, and holding ability you want. Sugar Buns is a Sugar Enhanced (SE) yellow hybrid with absolutely scrumptious golden kernels and is positively scrumptious. For SE whites, you can't beat Silver Princess, with extra-long ears bursting with flavor. And for the sweetest ears yet, you absolutely must try new Corn Mirai™, available in Yellow, White, Bicolor, and even a Mini!
 
About two weeks later:
When your corn reaches about 5 or 6 inches high, plant Bean seeds (6 to 8 of them) around the edges of the flat top or about halfway down the sloping sides of the circular mound. Push the seeds down deep into the soil and, if you're planting on the slope, make sure the soil is nice and firm. Add a bit of Nature's Aid at planting time to help the Beans fix nitrogen.
 
To get your Beans to climb up the cornstalks, choose Pole rather than Bush varieties. Smeraldo is far and away the best-tasting Pole Bean, with flat pods up to 10 inches long on vigorous 4- to 6-foot vines. Park gardeners rave about Kwintus, a super-early performer with succulent pods on stringless 8- to 10-inch pods. And Blue Lake is the classic name in Beans, with top-quality dark green pods that are both stringless and fiberless, even if you pick them a bit late. We even have Blue Lake available in organic seed!
 
One week or so after that:
Plant Squash seeds around the base of the mound, on flat ground. You can make them radiate around the mound, or just go in the direction you have available space! 6 to 8 seeds in a ring around the base of the mound is usually plenty.
 
The traditional Squash family member for this Sister is Pumpkin, with its all-American flavor and long growing season. Rumbo is a unique Korean variety that looks like an heirloom Pumpkin but tastes sweeter and more succulent than a Butternut Squash! For a quicker harvest, grow Summer Squash varieties such as organic Park's Early Summer Crookneck or Zucchini such as space-saving One Ball Hybrid.
 
When everything begins growing:
Thin the plantings to 2 or 3 Corn stalks, each with no more than 2 Bean plants winding around it. (You'll need to help the Beans get started growing up the stalks). The Squash is going to vine along the ground, so the number of plants you need depends on how far apart your mounds of corn and beans are, how long the vines get, and how much walking space you need in the garden.

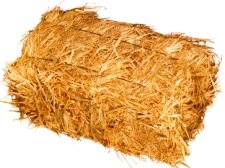
Garden in a Bale of Straw

straw bale for gardening
Limited space? No soil? Toxic or rocky ground? Spare corner? Edge of drive way or yard? Here's bales of advice for you on the straw bale gardening.

Straw bale, or hay bale gardening is not to be confused with using loose straw in your garden for mulch or compost.  What we're talking about here is the whole bale, as it stands, tied with twine and used for planting plants on the top.

The bale is the garden. Put it on your balcony or path if you want to. Use one or umpteen bales of straw or hay as you need and in any pattern. Because the straw bale garden is raised, it's easy to work with, so make sure you allow for handy access.

Which straw to use for straw bale gardening? The best straw bales, for a garden are wheat, oats, rye or barley straw. These consist of stalks left from harvesting grain, they have been through a combine harvester and had the seeds threshed from them, leaving none or very few left.

Hay bales for gardening are less popular as they have the whole stalk and seed heads with many seeds.  They also often have other weeds and grass seeds to cause trouble. Use what you can get locally--it may even be lucerne, pea straw, vetch or alfalfa bales. Corn and linseed (flax) bales are not so good as they are very coarse, and linseed straw take a long time to decompose due to the oil residue left on the stalks.

It's simple to pull out the odd wayward grain seeds with straw bale gardening, but hay hales have a tendency to grow the likes of a small lawn! Thus you may need to occasionally give them a haircut rather than try to pull the tenacious new sprouts out. Hay bale gardening has one up on straw in that it is a nice warm and rich environment with enough nitrogen to continually supply growing plants. Straw is mostly carbon and so nitrogen must be added for plant growth (see information below).

Where to buy straw bales for garden? Most garden supply centers and nurseries sell straw bales. Farmers are you next bet if you live in the country. Also try animal breeding places and stables as they often buy straw bales in bulk for bedding and may sell you one.

How much do straw bales cost? Straw bales costs vary from country to country, but your cheapest option is usually going to a farm where you could be lucky at $1.00 per bale. Otherwise prices range from $2-$3 per bale. Still good value for an instant little garden!

Arranging your straw bale garden. Put each bale in the exact place, because it's hard to even nudge these monsters once you've got your little straw bale garden going.

Just like a normal vegetable garden your straw bale plants need sun, 4-8 hours if possible, depending on your choice of plants. Leafy greens and some herbs need slightly less sun than vines and tomatoes for example. 

A very popular idea for hay bales and straw bales is to make a raised garden bed with the bales as the edge. This limits excessive evaporation from both the garden in the middle and one side of the bale.

If you are starting a no-dig garden and don't have enough filling to begin with before your compost, kitchen scraps, grass clippings, leaves, mulch or whatever you have, are not ready, then a cheap way for the first year is to buy bales and with a little bit of compost on the top, and a few other ingredients mentioned here, you can get your garden going the first year.

Deter those darn digging moles, gophers, rats or whatever thieves populate your area, by first laying down galvanized wire bird netting before laying your bales down. Lay the bales lengthwise to make planting easy by just parting the pads of straw.

There are two options on which side to lay straw bales:

1. Make sure the string is running around each bale and not on the side touching the ground in case its degradable twine such as sisal. The straw is now vertical, cut ends up. This means when you water , much of it will go straight through the bale and wash away.

2. Laying your bale or bales with the twine touching the ground (as long as it's plastic or wire twine of course), means that the straw stalks are horizontal and water will more likely soak in and not flow through the bale and be wasted.

This method of laying down your straw bale lends itself to using a soaker hose better than the vertical way.  If using a soaker hose, which are marvelous by the way, lay it under the twine to stay in place. The steady slow drips of water will find it hard to escape through channels, unlike the vertical method whereby the water channels downwards.

Starting your straw bale garden.  If you start with aged bales of about 6 months or more, they may already have been through their initial weathering and starting to decompose slightly inside.  If they have been wet at all they almost certainly would have lost their cool and done their cooking.

If not and they are still new or in pristine condition, they need to do a bit of stewing before it's safe to plant in them.  Thoroughly soak with water and add more water so they don't dry out at all for the next 5 days whilst the temperature rises and cooks them inside.  Slowly they will cool over the next 1-2 weeks and then be ready for planting.

You can plant when the bales are still warm( which promotes root growth). The bales won't be composting much inside yet, that takes months, but you don't want that initial hot cooking of your plants.

Some sneaky people speed up the process of producing microbes and rot by following a 10-day pre-treatment regime of water and ammonium nitrate on the top of each bale. But, hey, organic gardeners are a patient lot aren't we, so let's follow nature. Just so you know, the chemical ammonium nitrate (AN) acts as a catalyst. It is high in nitrogen and encourages and feeds microbes which rot the straw so plants can grow.

More natural ways that help speed up that all important burn out, are to spread on a high nitrogen organic fertilizer just before you start your watering process and watered in each day as detailed above. Remember though that this fertilizing along with the initial soaking will mean that the bales will continue to cook longer and you will have to wait before planting. It ultimately provides a better base and growing conditions and saves you having to be so worried about getting nutrients to your plants as they start growing.

Some materials that can be used are:

   * A 3cm (1') layer of fresh chicken manure - double that if aged chicken manure, or
   * Other suitable manures such as turkey or rabbit - 5mc (2") layer, or
   * A covering layer of 2/3 bone meal to 1/3 blood mean, or
   * A very thick layer of milder stuff such as spent coffee grounds.

Also to balance the growing medium, add potassium by sprinkling on a handful of sulphate or potash.

 
Watering a straw bale garden. Keep watered. That's going to be your biggest task -- twice a day if necessary. Straw bale gardening uses more water than a normal garden, so set up a system now. It may be that hauling out the teapot on each day is enough in your area, or you may need to keep the hose handy. A soaker hose system set in place is perfect.

Anything you can put on the exposed sides of your straw bales will help conserve water and stop them drying out in the sun. Low bushes or herbs, planks or bricks and so on will work. If you have some plastic and don't mind the unnatural look in your garden, then put that around the sides. Keep the twine there to hold it all in place for a long as possible.

What plants to plant? Annuals of vegetables, herbs or flowers will love your straw bale. Remember your bales will be history in 1-2 years. Young plants can go straight in. Pull apart or use a trowel and depending on the state of the straw, put a handful of compost soil in too, then let the straw go back into place.

Seeds can be planted on top if you put a good 5cm (2") layer of compost soil there first. Top heavies like corn and okra are not so good unless you grow dwarf varieties. With straw bale gardening it's hard to put solid stakes in so big tomato plants are out, although they will happily dangle over the edge.

Each bale should hold:

   * Up to half a dozen cucumbers, trailing down, or
   * Squash, zucchini, melons -- maybe 3 plants, or
   * A couple of tomato plants per bale with one or two herbs and leafy veggies in between, or
   * Four pepper plants will fit, or
   * 12-15 bean or pea plants, or
   * A mix of the above or any other plants you like.

Since there's no limit and why not poke in around the side some flower annuals for color and companionship if you like.

Once a week or more often when your plants are in full growth water in a liquid organic feed, such as compost tea or fish emulsion. Add some worms on top if you want to use your bales only one season. If you are using hay bales instead of straw bales, the liquid feed can be spaced much further apart because hay bales have more nutrient dense environment.

You'll get one good season out of a hay bale garden, and usually two with a straw bale, albeit with a bit of sag. It make s for great compost or mulch when finished with.


- See more at: http://www.no-dig-vegetablegarden.com/straw-bale-gardening.html#sthash.PkoZhaop.dpuf


Wednesday, March 27, 2013

Want to Save Money on Groceries? Grow These Six Veggies at Home

If you are growing vegetables in the hope of saving money, here are some suggestions for crops which have delivered real cost savings for us…


By Greg Seaman, Eartheasy
Posted Jan 19, 2011

There are many benefits to growing your own vegetables, but saving money is not necessarily one of them. Some vegetables are simply cheaper to buy at the grocery store, and no amount of gardening savvy will result in a cost-saving benefit.

Over the years we have experimented with many vegetable crops, and while saving money is not the prime reason we grow vegetables, it is a consideration in our choice of what to plant. Although we are fortunate to have plenty of ground space for gardening, the work required to keep the beds fertile and weed free discourages us from planting some crops which are ‘dirt cheap’ when bought in season.

If you are growing vegetables in the hope of saving money, or want to make the most from limited garden space, here are some suggestions for crops which have delivered real cost savings for us. When planning your garden and buying seeds, however, be sure to choose varieties which do well in your growing region. Even within regions there are ‘micro-climates’ which affect growing conditions, so check locally for advice about recommended varieties for your locale.

1. Lettuce


You may have noticed the price of lettuce has risen considerably in the past two years. At a nearby market today, red leaf lettuce cost $1.79 for a small bunch. (And the Spring Mix, a ready to serve assorted lettuce mix sold in a plastic box, cost $4 per 300 grams!) If you grow your own lettuce, from a $2 package of seed you’ll recoup the cost within a few weeks and enjoy your own fresh lettuce for months. Be sure to plant only a small amount of seed, or the unharvested mature lettuce will bolt. Save the remaining seed for replanting every two to three weeks throughout the growing season. This will ensure a steady supply of fresh greens for the table.

In our garden we grow two varieties of leafy lettuce, Magenta (red leaf) and Concept (green leaf). We do not grow head-forming lettuce, like Iceberg, because it takes longer to mature and when ready it gives us too much lettuce at one time. We find that head lettuce also harbors more slugs. The leafy varieties are easy to harvest by picking the outer leaves, and this lets the plant continue to grow and produce.

2. Bell peppers


Green bell peppers cost about $1.50 each at our supermarket, and yellow and red peppers are even more expensive due to their extended ripening times. Pepper starter plants, however, cost about $1 each at our local nursery. This past year we planted ten pepper plants and each plant produced at least six peppers. We let most of our pepper crop mature until they turn red because they taste sweeter than green peppers. My rough estimate is that our $10 investment yielded about $100 in peppers. We don’t use commercial fertilizers, but did add about $5 in peat moss and $5 in amendments like rock phosphate and lime.

Easy to grow, peppers are commonly started early in small pots and transplanted when it’s warm enough outside. Pick off any small peppers that may form on transplants or the plant growth will be stunted. Pick the green peppers as soon as they reach size; this will stimulate new fruiting and increase the yield per plant. You can leave some plants unpicked if you want the peppers to sweeten and turn yellow or red; however, these plants will produce fewer peppers.

3. Garlic


The price of a garlic bulb ranges from $1 to $7 a pound. Our homegrown garlic, grown from cloves saved from the previous crop, cost less than $.50 a pound to grow ourselves.
Garlic is one of the easier crops to grow, but we lost our first couple of crops due to over-watering when the plants were mature. Garlic is often grown over winter which makes good use of garden space. Weeding is important as garlic does not like competition. Harvesting on time and curing properly are important for producing bulbs with good keeping qualities.

In northern regions, garlic does best when planted in the fall. The timing of fall planting should be such that the roots have a chance to develop and the tops do not break the surface before winter, about three weeks before the ground freezes. In some regions spring planting is traditional. We have planted garlic in the spring with mixed results.

4. Winter Squash


At our local supermarket today, winter squash varieties cost between $1.29 and $1.99 a pound. (This is mid-winter pricing, which is more costly.) Our four homegrown squash plants yielded about 40 squash, weighing 4 lbs each on average, which adds up to about 160 pounds. This is worth between $200 – $300. We were given the starter plants, and spent about $15 in soil amendments. Squash starter plants are available for about $2 each.

Winter squash are a favorite among gardeners because they’re easy to grow, don’t require weeding once established, and most importantly, they keep through the winter to provide a valued vegetable for eating all winter and spring. The squash bed does need to be richly prepared before planting, and the runners need a lot of room to spread. If you have space to spare, then growing winter squash makes sense, and saves dollars. (In the photo below, all the squash leaves are from a single plant, which yielded 14 large squash.)

5. Tomatoes


It’s difficult to come up with an accurate figure for the cost of tomatoes because the cost varies so much by season and region. But assigning a range of $2 to $4 a pound is reasonable for this comparison. Last summer we planted four plants of a large variety (Big Beef), two cherry tomato plants (Sun Gold), and two paste tomato plants. Each of the larger plants produced at least 15 large beefsteak tomatoes weighing 1 pound or more. I would estimate that we grew 80 pounds of tomatoes (worth $160 – $320) for a cost of about $40. (Starter tomatoes are about $4 each, and we added about $15 in amendments.
We grew all eight plants in the same 6’ x 12’ plot. The cherry tomatoes provide an early harvest, the large tomatoes are used for summer and fall eating, and the meaty paste tomatoes are good for freezing and canning. Paste tomatoes also make excellent fresh or cooked salsa and sauces. Having a ready supply of tomatoes for cooking during the winter months adds value, since the price of tomatoes goes up in winter.

6. Broccoli


Broccoli costs about $1.50 a pound, which is pretty cheap. Central head weights range from 0.3 to 1 pound, so you get a fair amount of broccoli for the price. After cutting off the central head, many side shoots will grow below, and will equal two to three times the original crown. Our ten broccoli plants produced about 2 pounds each, so we grew about $30 worth of broccoli for a cost of about $10 in soil amendments. The amount of money saved is not enough to get excited about, but the convenience of having fresh-picked broccoli available for 6 – 8 months is a real bonus.

Broccoli is a cool-season crop, and can be grown both as a spring and a fall crop. Broccoli is a heavy feeder and requires soil rich with organic matter. We plant our beds in green manure during the off-season which is a low-cost way of fertilizing the soil. Before planting, compost and peat are worked into the soil, and lime and rock phosphate if needed.

Broccoli is highly nutritious and has been deemed an anti-cancerous food by the American Cancer Society. This vegetable is a good source of Vitamin A, calcium, and riboflavin (or vitamin B2). Even in our northern region, we are usually able to keep a few broccoli plants over winter and harvest the side shoots which continue to sprout. We’ve even had a few hardy plants continue to produce while covered in snow.

The figures used in this article are approximate. We did not weigh every tomato or leaf of lettuce. And the list is by no means exclusive. There are other crops which are cost-effective to grow, and some of the crops listed on this page may be difficult to grow in some regions. The examples listed here show what’s worked best for us, and serve to illustrate that growing your own vegetables can bring down your family’s yearly produce expenses.

As any gardener knows, growing vegetables is more than about saving money. Growing your own vegetables is healthier for the family because the produce is fresh and (hopefully) grown without chemicals. It is better for the environment by reducing the cost of food transport, there are educational benefits for the children, and oh yes, the vegetables will taste so much better!

Re-Grow Your Green Onions


Here is a great idea from the Homesteading/Survival Blog.

Image from Homesteading/Survival Blog
Did you know you can regrow your green onions??

You can cut off the roots and put them in water, then the roots will absorb the water and start to grow a new green onion. It takes a good 2-3 weeks for the green onion to grow completely so... you can use it again, but it grows a whole new one!!!
 

If you like this idea, you’ll want to get this book - Grow it, Don’t Throw It!: 68 Windowsill Plants from Kitchen Scraps: http://amzn.to/TA9DD4

Monday, March 25, 2013

How to Trellis Tomatoes

I can never get those tomato cages to work for me. I tried the Topsy-Turvy one year and dumped the tomatoes all over the ground ... maybe I will try this method for staking up my tomatoes this year.

Trellis like a Pro
by Sandy Swegel


My tomatoes are only a few inches tall and still indoors, but this is the ideal time to start thinking about how to trellis them. For years I fiddled with the dinky round tomato cages sold everywhere that just fall over when faced with a large indeterminate tomato. One year I even tried tying two cages on top of one another and it still fell over.

Market Farmers don't use wussy home-gardening-type trellises. They bring out the T-Posts and plastic baling twine orstring. (This is one time you can't use natural twines like jute or cotton...they are too stretchy.) The most common technique is called the Florida Weave.


Basically, you place tall (7 foot min) T-posts at each end of your tomato row. Every two or three plants, add a stake (or another T post). You will then “weave” the twine around the T-posts and tomatoes in a basic figure-eight shape. T-posts are super sturdy and stay put once you pound them into the ground. Ideally, you can string the T-posts before the tomatoes are tall or perhaps even planted. As the tomatoes grow you can tuck the growing edge into one of the rows of string. The beauty of the Florida Weave is that even if you are late getting your trellising in place, you can still do a pretty good job pulling up the overgrown tomatoes.


Photo Credits and More Info:
http://www.specialtycrops.colostate.edu/techniques/trellis.htm#tomatoes
http://www.foogod.com/~torquill/barefoot/weave.html
http://www.organicgardening.com/learn-and-grow/cat-s-cradle-tomatoes
http://www.finegardening.com/how-to/articles/supporting-cast-for-tomatoes.aspx

Saturday, March 23, 2013

Green Onion Benefits and Growing Tips

I just bought my Walla Walla sweet onion sets, some shallots (which were $6.99/lb at Market of Choice so I decided that I would grow my own), and green onions.  I am all ready to plant them, but I thought I better figure out HOW!!

I use a lot of shallots or green onions in my cooking for a little flavor and color, but I never realized they were so good for me.  Here is a little poster that explains some of their benefits.


GROWING GREEN ONIONS -- TIPS AND TRICKS
These tips come from the Veggie Gardner Website.
 
Green Onions have an almost unlimited amount of uses and are very easy to grow. Green onions can be grown from seed or as sets. I love green onions in soups, salads, on top of a nice steak, used as a baked potato topping, and many other ways. Green onions are also referred to as bunching onions, and have a milder onion taste than storage onions.

They are actually immature onions that are harvested before the bulb matures. The green onion features a dark green stem (also called scallions) and a white bulb with roots. Both parts of the onion are edible.  There are several different cultivars of green onion including, 'Evergreen Long White', 'Parade', and 'Red Baron' to name a few.

Planting Green Onions

Evergreen Long White Green Onions
Image from www.veggiegardner.com
Plant onion seed as soon as the soil can be worked in the spring. Onion seeds germinate in a wide range of soil temperature, between 65° F and 86° F. 

Sow and cover seed with ½” of soil and keep moist. Seeds can be started indoors 6-8 weeks prior to planting. They can be set in the garden about 1-1½” apart. To plant onions sets, simply press sets into the soil about 2″ apart.

Onions benefit from full sun, a soil pH of 6.0-7.5 and a well drained soil with plenty of premium compost or well rotted manure added. Feed with a complete balanced fertilizer during the growing season.

Maintaining Green Onions

Once your green onions have sprouted become well established, they are pretty easy to maintain.
Green onions generally need about one inch of water per week. If green onions are grown in rows, or raised beds, soaker hoses can be used for irrigation. It’s also a good idea to mulch around the plants to conserve soil moisture and suppress weeds.

The soil should be moist, but not soggy. A great way to check to see if your green onions need watering is the finger test.  Simply stick your finger in the soil down to the second knuckle near the green onion plan. If the soil feels moist there is no need to water. If the soil feels dry go ahead and water well.  Repeat the finger test once a week depending on how much rainfall you have received.
Green onions can also be grown successfully in containers. Soil in containers can dry out quickly during very hot summer temperatures, so you may need to water them up to three times per day if rainfall amounts are inadequate.

Allowing the soil to dry out too much can cause the onion bulbs to also dry out.
Also, make sure the container has good drainage holes. You want to avoid soggy soil in containers, too. Getting the watering amounts down right may take some practice, but it’s not too difficult.

Harvesting Green Onions

Green onions are best picked when they are young and tender. Dig or pull them when the tops reach between 6-8″ tall and the bulb have begun to swell.

To use as dried bulbs, wait until the green tops have withered and browned, then stop watering. Most green onions are ready to harvest between 70-90 days.

When you are slicing or preparing a green onion, leave about 1″ above the root. This section can be re-planted into the soil. Place the root section about 1″ deep in the soil, root side down, and lightly cover the top with soil.

The root section will then re-sprout the green tops within a couple weeks. This process can be repeated several times with the same root section.  A great way to “recycle” your green onions!

Pests & Diseases of Green Onions

Pests and diseases are rare for the home grown green onion, but they can become susceptible to maggots, thrips, and soilborne diseases. Use crop rotation to avoid these issues.

Monday, March 18, 2013

Raised Bed Gardens - Tips & Tricks


Doreen's article:

Every time I open a plant catalog or see a television commercial for sale priced $99 raised bed gardening kits, I cringe! I've never spent more than $8 to build a four-by-four-foot bed or $35 to build a 20-foot-long one.

My husband builds mine. He buys two 1 by 8-inch cedar boards, which don't rot with age. They come in 8-foot lengths, which is perfect for 4 by 4-foot beds. Cut each plank in half, so that it is 4-feet long. Or have the store make the cuts. Many places will do it for free.
Husband also buys a 3-foot length of a 1 by 1-inch pine stake; he cuts it into four pieces and uses them to nail the cedar boards to at corners for bracing. That's all! Each box costs less than $10 to make.

how to build raised garden beds
Grouping together several raised beds makes a substantial vegetable garden that is easy to maintain, with no weeding and crops that mature fast

I place the boxes on cleared ground. Turf should be cut and rolled up, or vegetation killer can be used. Strong white vinegar applied to grass in sunlight will kill the turf in hours. After I situate the boxes (four or five grouped together makes a good sized garden), I put down three layers of newspaper to suppress errant weed or grass seeds that might sprout. Paper degrades fully within weeks and feeds the soil.

Another fast, cheap method of building raised beds is to use concrete construction blocks. They have a big bonus. Their holes can be filled with soil mix and planted with herbs or strawberries.
The extra gathered heat from concrete is perfect for Mediterranean-type herbs such as rosemary and lavender. Strawberry plants grow huge and fruit fast in the holes. Each block is 16 inches long by 8 inches high and costs about $1.30 each at big box stores. Beds of 13 feet or longer by 4 feet wide are cheaper to build using blocks than with cedar boards.


Cement construction blocks average about $1.30 apiece across the country.

You will be planting seeds and transplants close, because the beds are smaller and the soil is richer. But, plants grown close together in raised beds mature faster, because they compete for nutrients and sunlight. Each plant senses the distance of others and adjusts its metabolism to compete. Several university studies have proven this competition syndrome by identifying how plants perceive others nearby using the green light spectrum.


This 4-by-4-foot bed is crowded with productive peppers, cucumbers, a tomato plant and insect-repelling flowers that are edible.

Raised Bed Soil MixThe more organic matter there is in soil, the better. Soil microbes are fed, oxygen and water
readily reach roots and plants thrive. Here’s the recipe I’ve developed in the last decade that
works best for my garden.

For one 4-by-4-foot raised bed. (Multiply amounts to fill larger beds.)
2 bags (2-cubic-feet each) top soil
1 pail (3-cubic-feet) peat moss
1 bag (2 to 3-cubic feet) compost or composted cow manure
2-inch layer of shredded leaves or grass clipping.

If you use grass, make sure the clippings are not from a lawn that has been sprayed with herbicides or been fertilized with a food that contains granular herbicides to kill weeds. Both persist and will kill plants beds up to three years after the initial application.

Mix all materials with a hoe or cultivator and water well. Be sure to mulch well with organic Matter such as more leaves or clippings or straw.

Thursday, March 14, 2013

Germination Temperature Guide


Tom and I have been busy planting seeds and starts in our greenhouse and cold frames.  Here is a great chart from Roots Nursery.com that shows how long it will take your seeds to germinate according to temperature.  This is a great reference.

Tuesday, March 12, 2013

Seed Starting Chart


If you are like Tom and me, you can't wait to get your seeds into the ground.  Here is a great little chart from the Knowledge Weighs Nothing Website to let you know when to grab your trowel and start planting.


Monday, March 11, 2013

How to Build a Hanging Gutter Garden

Here is another vertical garden idea I "borrowed" from The Goods Home Design Website.
Also check out my "Strawberry Gutter" idea in the next post!!!
Gutter gardens are a great way to take advantage of the vertical spaces around your home to grow flowers, edibles and create a stylish space divider or privacy screen without spending too much money.
MATERIALS:
1 – 8′ PVC white rain gutter cut into 3 32″ sections
6 – PVC white gutter end caps
2 – 1/8″diameter steel cables cut to desired length
6 – Feeney Cross Clamps (see image below)
6 – 1/8″ diameter Feeney steel rods
2 – Galvanized eye hooks
Potting soil and Plants

TOOLS:
Cordless Drill with drill bit set
Hand saw or hack saw
T-square or straight edge
Tape measure
Permanent marker
Level
Eye protection
INSTRUCTIONS:
1. Determine the center of your gutters and draw a reference line (otherwise your gutter won’t hang right).

2. Mark and drill the holes for the steel cable rods. Find a drill bit the same diameter as the cable to minimize the wiggle room.
3. Space drill holes a few sizes larger to make sure you get good drainage (plant roots hate sitting in water for long periods of time).


1. Locate a spot that gets at least 4 hours of sun. I placed mine on the cross beams of a pergola I built a couple of years ago.
2. Drill pilot holes (a hole slightly smaller in diameter than the screw diameter) to make screwing in the eye hook a lot easier. Make sure the holes are the same distance as the steel cable so they hang straight down.

3. Slide the gutters through the holes and secure them with the cross clamps at your desired heights. You’ll notice I placed mesh tape (normally used for drywall joints), left over from another project, over the drainage holes to keep the soil from seeping. However, I think the holes are small enough, this step is not necessary. I did it out of habit.
4. Secure the gutter with the cross clamps and half circle steel rods.


Saturday, March 9, 2013

How to Build a Living Wall (Vertical Garden)

This great idea came from The Tumbleweed Traveller. I think we might try this, but in a smaller version.  This would make a GREAT edible privacy fence in a small yard!!! Diagrams and Building Instructions are included in this article.  Enjoy!
Liz, myself and the newly planted vertical garden.

A few years ago now, on a trip to Paris, quite by chance I came a cross a vertical garden or living wall created and installed by the French gardener and designer ‘Patrick Blanc‘. The plants are rooted into a thick hydroponics membrane through which a nutrient enriched solution trickles, pumped up from a reservoir at the base of the wall which keeps the plants fed and watered.

The vertical garden on the wall of the Musée des Arts Premiers Quai Branly in Paris.

I had often spoke with a friend of mine ‘Will Giles’ about how we could create a DIY version, looking at all the possible ways of supporting it, what to use as the membrane, how to hold it up, what to use as the reservoir and how to feed the plants among many other things. After a while we came up with a much simpler solution, as the best ideas always are. Do away with the expensive and intricate hydroponics and build a structure that is essentially a series of hammocks, a bit like a multi story window box. It may take a little bit of daily care to keep the plants watered and looking good but is much easier and cheaper to build.

It was while I was working at Urban Jungle hardy and exotic plants nursery that I had the opportunity to put the idea to the test. I had a rough idea of how the structure might work but no set figures to work from. I could see ‘Liz’ my boss and one of the owners of Urban Jungle looked a little apprehensive as I was attaching 12ft high pieces of timber to the edge of one of the pergolas in the middle of the nursery. Once the wall had taken shape and looked as if the monstrosity was going to work, apprehension quickly turned to plants. Once the wall was up and the pockets filled with compost we set about rounding up plants from the nursery and setting the out on the floor in front of the wall for planting, and then planted well into the night. The wall turned out to look not too bad and after a week or so, when the leaves had turned themselves up to the light, it looked pretty damn good. Many visitors to the nursery asked how it was built so here, at last, are the designs for the vertical garden. Sorry about the wait.

Planting the wall by headlight.

The wall is now coming up to its second season and has endured one of the coldest winters for years, where I’m shore the entire thing would have been frozen solid for several days if not weeks at a time. I’m no longer at Urban Jungle but have heard from Liz that some of the plants are now on the move and in a short time she will be able to see what had pulled through and what needs tweaking. Some plants were not hardy so there will inevitably be some gaps to plug. Liz is going to put up a post on Jungle Drums, the Urban Jungle blog,  in the coming weeks on the progress of the wall, what has worked, what hasn’t and the new plants that will fill the gaps. As soon as it’s up I’ll post a link.

HOW TO BUILD YOUR OWN LIVING WALL OR VERTICAL GARDEN

1) CHOOSE A LOCATION- Once the wall is planted and watered it will be very heavy so a suitable structure is needed to support the wall. If the base of the wall is resting on the ground and this is not a solid surface, place slabs under each of the uprights to spread the weight and prevent it from sinking into the ground. If the wall is not resting on the ground make shore the brackets used to hold the living wall to the supporting structure are strong to take the weight of the wall when saturated. If the supporting is a house or shed wall the structure should be mounted away from the supporting wall to leave a cavity and avoid causing damp problems.

2) ORIENTATION- The place we chose for the wall at Urban Jungle by chance faces east. This in my opinion is the best direction for it to face as it gets direct light up until noon in the coolest half of the day. If the wall was south or west facing more particular attention would have to be paid to watering and plants would have to be selected to tolerate direct light. Regarding watering, it is important to be diligent as anyone who has let a hanging basket dry out knows it takes a while to re-wet, and you cant dunk the wall in a bucket. North facing walls would require less attention but the constant shade will limit the choice of plants.

3) CONSTRUCTION- The wall at Urban Jungle was 12ft high, 7ft wide and build against a large pergola for support. I used three uprights made from 12ft lengths of 2x4 tantalised timber. The two uprights on the edge of the wall were attached to the uprights of the pergola with brackets and the middle upright stabilised by a post in the ground and two cross members. Each of the uprights was rested on a paving slabs to help spread the weight. The horizontal spars that support the planting hammocks were made from tile baton. Each spar was screwed in place with a little wood glue for extra support. The spars were placed 10cm apart. This made the pockets closemouthed together so that when planted not too much gaps are left but there is enough room to squeeze the root balls in.


How to build the timber structure that supports the wall.

4) POCKETS- Because the wall had three uprights there had to be two series of pockets as they cant cross the uprights. The pockets were made from heavy duty landscape fabric which needs to be about two and a half times longer than the height of the wall and about 20cm wider than the width between the uprights. Start by folding about 10cm in each side so the fold is facing the front and attach to the back of the top spar with staples or by screwing a second spar over it. Push the fabric in between the top and second down spar so it forms a pocket about 15-20cm deep. Place a few staples in the second down spar so the fabric doesn’t slip. This will not need to be as secure as on the top spar as the weight of the compost will hold each pocket in place. Repeat the process down to the bottom of the wall and securely attach the end of the fabric to the bottom spar.


How to attach the landscape fabric to create the pockets.

5) FILLING- We decided not to add any ingredients to the compost like pumice or perlite to reduce the weight as we were happy that the structure would support the weight. We mixed plenty of slow release fertiliser granules into the mix as there will be a large amount of plants in a relatively small volume of compost. We also added a quantity of swell gel to aid water retention. Fill the wall from the bottom pocket up so that each filled pocket rests on the one previous. Fold up the excess landscape fabric that was folded in on either side to prevent the compost from spilling out the end of the pockets. Each pocket should only be filled three quarters as the root balls from the plants will take up a proportion of the space and the soil level in the pocket  must be just below the spar so water can soak in and not poor off the wall.


The newly planted wall before the leaves have turned up to the light.

6) PLANTING- We set the plants out on the floor in front of the wall to create a design before we started to plant. Spacing will depend on the plants you use and the size of the plant used. Start planting from the top down. If you plant from the bottom up the lower plants will be covered with compost. Lay a sheet down bellow the wall as a lot of compost will be spilt. Make shore the plants are well watered before planting as many of the root balls will have to be teased apart and squeezed into pockets. Despite our planning we changed the design considerably while planting as it looked so different when vertical. Liz more so than other gardeners is a very impatient gardener so we planted a little closer than was probably necessary and plugged the gaps with Tradescantia cuttings, Spider plants and Begonia sutherlandii. These quickly grew and filled the gaps. We debated weather to use only evergreens but decided this would be too limiting on the design possibilities and would make the wall predominantly green. The down side to using deciduous or herbaceous plants was that the wall will look a little sparse over winter. We put a few dwarf Daffodils in the wall to see how they would fair. These wouldn’t hide the landscape fabric, but would add a splash of colour before the new shoots emerge.

7) WATERING- The wall will have to be completely manually watered. Rain will have little if any benefit to the wall other than slowing the rate at which the wall dries out, plus the leaves will arrange themselves like roof tiles shedding all the rain water. We didn’t get around to installing a trickle irrigation system and hand water the wall daily, sometimes twice if it is really hot and or windy. From autumn to early spring watering will be much less but still important. To install a trickle system there would need to be one trickle pipe along each pocket with dripper every 30cm or so. The dripper pipe would need to be the sort that delivers a specific flow of water rather than a simple leaky pipe as the bottom of the wall would receive more water than the top. The watering regime would have to be little and often to prevent the nutrients from being leached from the compost.

8) FEEDING- The slow release fertiliser we put in the wall was more than enough to see the plants through the first season with no signs of stress. The second and subsequent years are where attention is needed. Each perennial plant should have a hanging basket pellet pushed into the compost near the root ball. Any annual or replanted patches should have the old compost removed and replaced with fresh compost and slow release fertiliser. The old compost will be matted with the roots of perennial plants which should be carefully cut without cutting the landscape fabric. If a trickle system is installed a liquid drip feeder could be attached or if hand watered use an occasional folia feed.